If you follow KPOP and are an avid fan of the Pledis born girl group, Pristin, then I’m sure you’ve heard the news of Pristin’s youngest, Kyla, leaving for treatment. What kind of treatment is it however? Could it be the acclaimed injuries she received that has been floating around, or is it the fact she can no longer take the criticism anymore?
I’ll share my thoughts below.
Before I say anything on the topic, I want to throw out a disclaimer.
These opinions are of my own and the way I feel should not determine how you too feel about this issue. Keep in mind that the KPOP world is more than just a group of people singing, but a business. The idols that the companies throw out there are the products, and we listeners, are the market; the consumers. I will be using reflections on actual markets and produce as a reference to describe things and in no way do I mean any ill harm to the image of Kyla, nor am I here to express distaste in her appearance. Quite frankly, I think she looks perfectly fine, but you’ll see that in the post. Keep that in mind while you read what I have to say on the entire issue.
OH and one more thing. I tend to be oblivious to the way I talk and type, so if I do end up coming off rude or insensitive, please let me know because there is a 90% chance I had no idea about it, and am open to your feedback to address any issue if there may be any at all. Thank you!
FIRST and foremost, if you have’t read or heard anything, Pristin’s Kyla has been receiving a lot of backlash from netizens for her physical appearance, making comments on her figure, her thighs, her stomach, her everything. Their words, and I quote, are that “she looks fat,” and “she’s one of the biggest girls I have seen debut on stage.”
She’s 15 years old. F I F T E E N !
Anywho, netizens have decided it was a good idea to screencap images of Kyla and hashtag things like #obese or #fat on her images, to which a lot of people agree with the nasty comments made about her.
It has been reported that Kyla has withdrew from the group temporarily to receive treatment for an alleged injury she sustained while on promotion, but some netizens speculate she is taking the time off to avoid the public eye as she may be having depression from her negative backlash on her appearance. What does Anthony think of this entire issue?
For starters, as I mentioned in the disclaimer, Kyla is indeed a product of Pledis. Let’s say that Pledis is a Sephora store and they’re looking to promote a certain product and have it available for the customers to try and buy (us listeners). As a customer, would you not like your product to be as functional and as good (if not, better) than what is also being promoted in the store? For Kyla’s situation, I regrettably have to say that yes, she is quite big in terms of what you’d see for a typical FEMALE artist.
I specifically draw attention to the word female. Why is that so? Most males in the industry don’t ever get pressured into looking a certain way in regards to their physical appearance. So long as you have abs, you rip your shirt off and gyrate your hips in a motion that makes it look like you’re humping the air (LEETEUK FROM BONAMANA ERA OH MY GOD YES), most people are satisfied. When it comes to women however, it seems your body needs to be slender, with minimum curvature and be as pale as snow, otherwise you don’t fit into the social standards for female KPOP artists.
Let’s compare this situation with Kyla to a male artist. Have you heard of Super Junior’s Shindong? He has been known to be the bigger artist when it came to male idols, and yet, most people gave him more slack. Why? Well he’s a member of one the most popular male groups to date, and, well, he’s a man. He even said it himself.
“I can be bigger because I am a man. I shouldn’t have to change my weight based on other people’s opinions. However, you are a woman and you should be skinny otherwise nobody will like you.”
Please tell me what kind of bullfuckery this load of shit is? Let me start off saying Shindong that you are in NO position of saying ANYTHING like that to a woman. Her body, her choice, if what you are saying is true. IF you choose to be big, then by all means go for it. That should NOT stop any woman from doing the same, if that is what makes her happy. Secondly, what you said is sexist as it implies men are far more superior than women when it comes to body weight and body appearance. Why can a man be allowed to be bigger than the social norms, but a woman can’t?
This is prime example of the double standards set on female artists like Kyla, which I’m not OK with. Yes, I will have to fully agree that her size is not appreciated as far as KPOP goes, since unfortunately, the standards are tall, slim and innocent looking. Kyla is tall, but not slim in the slightest. However, as a MEMBER OF SOCIETY AND AN INDIVIDUAL OF HER OWN RIGHT I think she has every right to manage her appearance the way she likes. Besides, as previously mentioned, she is only 15 years old, healthy at that. She is still growing and who knows how she’ll end up looking after she matures. Heck, she herself wouldn’t have a clue. If you’re that worried about her appearance more so than her actual stage presence and rapping abilities then you need to have a good sit down and reflect on yourself. As for the past or the future, none of it matters right now.
What SHOULD be our concern is that Kyla is in recovery mode, and we all should, as consumers, wish her the best in her treatment, and hope that she can return to the stages as a rapper again, if that is what she wants to achieve in her life. Not to fat shame and call her derogatory terms to insult her visuals. The problem lies not only in the companies being pressured to create the perfect group (to rival the big 3 and make maximum profit) but us consumers as well. If we continually put pressure on our idols to perform, look and/or act a certain way, then we will forever be trapped in this vicious and toxic cycle because companies will enforce skinny idols and certain appearances to us all. I for one want to see a variety of people all loving who they are, not some dehumanized product being programmed to to perform a certain way for money. These idols are humans, not machines. Treat them like decent people, not like the dirt on our shoes.
That’s all I wanted to say. Any other issues worth talking about, or any additional points you’d like to include? Feel free to drop them in the comments below or through my SNS.
I haven’t been spending money lately, so I have really felt a huge decline on what to write about. This would explain the very LONG duration in which I have been posting, and since I have posted last.
I mean, as a beauty blogger, I find that I can only write about, or review so many products until I either run out of funds to support this space, or, if I literally have nothing else to say on certain things.
I suppose until I regain some of my inspiration back, I won’t be posting for a little bit longer. I do have the PONY EFFECT brushes and the cushion if you want a review on them all, plus, the History of Whoo cushion but other than that, I don’t really have anything new to talk about as of yet.
Just let me know what kind of content you guys want to see because I’m in a huge standstill at the moment and not knowing where to branch off to next.
Thank you for your support so far, and hopefully, your understanding as well.
Being involved in the beauty world, it comes to no surprise that all my friends, family and virtually everybody I encounter, know that I revolve around a lifestyle that most people probably have no time for; that is, everything beauty related. With that, also means I get the few odd gifts from friends; things like fake lashes, lipsticks in shades I would never imagine myself wearing, and of course, extremely budget friendly eye shadows.
Oh my lord, the amount of eye shadows I have received in my life in uncountable, though, none I have received thus far have been anything CLOSE to drugstore. I’m talking about the products you’d find at the dollar store. Things that no beauty would ever THINK to even try. I am however, an experimenter and a person who likes to at least, try and utilize whatever is given to me.
I managed to keep two shadow palettes, so today, I really want to see what a $2 AUD eye shadow can REALLY do.
When I say these are less than drugstore quality, I literally mean they are less than drugstore friendly. These eyeshadows are so cheaply manufactured and made, even drugstores don’t want them. Introducing you guys to the Runway Glamour Eyeshadow Palettes, in the collections Berry Bloom and Blue Magic.
Each palette comes with 6 shades; all are shimmery with small glitters. This means, a general eye look can’t be made with these eyeshadows if you are someone who prefers matte eye looks, or prefer using mattes for eye contouring and definition. I for one, am part of that bandwagon, preferring a semi-matte shimmer at the very least to define the outer corners or shading in the crease.
Before doing anything with the eyeshadows, I took the time to look at what were in my hands, make a quick prayer, re-evaluate my position in life and have the phone ready for when I will admit myself into hospital. I already know how budget eyeshadows, ESPECIALLY ones that aren’t even drugstore friendly, can be weak in pigmentation, chalky looking, crumbly in the pan, full of fall outs and just, ugly in general. Even though I’m hoping that these eyeshadows aren’t to that nature, I am secretly aware that my expectations will become a reality.
Unfortunately (?) my expectations were true. Here’s the arm swatch for reference.
TOP TO BOTTOM using the best of my color descriptions as possible, as these had no names: BLUE MAGIC PALETTE – silver, lavender purple, light aqua blue, dusty turquoise, maroon, navy blue. BERRY BLOOM PALETTE – champagne, muted brick, dusty rose, copper, warm taupe, chocolate.
The blue shadow palette looked pretty in the pan, though they’re all colors I’d never use in my life. Maybe the plum and navy blue, but just those two shades. It also came with a tiny sponge tip applicator which was cute, though I’ll never use it in my life.
The pink palette was just as pretty, and actually had wearable shades, so I was the most excited with this one out of the two. However, I was super upset to see that this palette didn’t even HAVE a shitty sponge tip applicator so that made me real mad. Anthony was mad, then he became sad.
Since I’m dealing with eyeshadows, I decided to try and play around as much as I could while I was putting myself at risk for an eye infection or irritation. For reference, I started off with an already made up base, eyebrows, slight nose contour and highlight. I tried a variety of brushes including Pony Effect, Etude House, Missha and MAC. I ended up sticking with Pony Effect brushes, since they performed the best with these shadows.
Reference: I’m combination sensitive with acne prone skin. I used Sulwhasoo CC cream, Pony Effect Mattifying Blur Powder, Clio Conte de Brow and TCFS Artclass.Starting off with the Blue palette, I applied several layers of the light aqua. Several layers WERE necessary because lack of pigmentation.I used the lavender purple shade on the inner corner and the dusty turquoise on the outer corner. Again, I applied 5 layers.After blending the harsh edges, I topped off using the silver color, which literally did nothing to the eyes. I doubt you can even see anything in this photo, since I couldn’t even see anything in real life.Lastly, to test out the pigmentation, I used the navy blue color to line the eye in a cat shape. I was surprised color could come out since the lighter tones needed several layers for a glimpse of pigment.Onto the Berry Bloom palette, I tested muted brick, dusty rose and copper. All the eyeshadows looked way too similar with each other to distinguish the difference between the three. I decided to stick with the dusty rose shade, applying several layers onto the lid.With the warm taupe, I blocked off the inner and outer corners and blended to remove harsh edges.Again, I doubt you can see, but I used the lightest shade (in this instance, champaign) on the centre of the lid for variation.Lastly, I used the chocolate to line the eyes to test the pigmentation. After using below quality shades, I was taken aback by the chocolate shade even coming out with color.
Overall, the eyeshadows were lacking in pigment, and required a minimum of 5 layers for color to even show up. Since these eyeshadows are all shimmery, it makes the color on the lids even worse, as it makes the eyes more and more glittery, puling away from the color payoff it lacks.
The blue palette applied smoothly with fingers, and the pink did as well, bar the champagne tone, being really chalky and powdery in texture from finger swatches and application. Brush application was even worse, making the smooth texture become really powdery and difficult to apply. The amount of fallout though… don’t even get me started. Oh, BTW I also tried the shadows with a wet brush, and that didn’t do anything. In fact, it wiped off all the shadow I had with my lids. UGH.
To choose my favorite colors from these two palettes wasn’t hard. In the blue palette I really liked the wine and the navy shades respectively. Even though the wine wasn’t as pigmented, it still gave me a light wash of color. The navy was the most pigmented in the palette, and could be used as eyeliner, or as a contour shade for a dark smoky look. From the pink palette, I liked the copper and the dark brown shade. Again, the copper gave me color payoff more than I was expecting, and though the dark brown wasn’t pigmented enough for a strong eyeliner, there was at the very least, color coming off the brush I was using.
Would I recommend? Surprisingly, yes. I started off with Missha cosmetics, since Missha was the only K-Beauty retailer here in Perth at the time, other than The Face Shop, which was out of my way to go to. Since I applied makeup inexperienced, I had no clue what the hell I was doing, and ended up wasting products because I thought I was doing everything correctly.
For a beginner, these eyeshadows aren’t going to blow out your budget at all, have colors you can experiment with and being that these shadows aren’t strong in pigment, means you’re not going to leave the house looking horrendous; well, not as bad as I would have starting out with makeup. If you at the very least know your way around makeup products, then you can skip this recommendation because these shadows are shit.
If you enjoyed this post, don’t forget to like, subscribe to my blog and share with your friends and family. Have you tried low quality makeup products before? Did your face burn off in the process? Let me know down in the comments below, or through my SNS, which you can find below.
This post will be informal and completely unrelated to beauty, judging from the title. Just to clarify, these are my PERSONAL opinions, and this is how I feel about the whole matter.
I am also ditching my usual format with this post, simply because I want to just talk about this little issue here.
OK first of all, if you guys don’t follow any KPOP news, former After School member Uee has lust revealed she is dating idol Kangnam. It sounds sweet, but in reality, prior to hearing this news, she has lied to her fans and media that she isn’t in a relationship with him and denied all allegations. Shortly after denying everything, she then reveals the truth, which has got a few negative comments in all the forums at the moment.
So what do I think of this?
For starters, I support Uee as an idol. I support Kangnam as an idol. I support Uee and Kangnam together. I like them both, and I hope they can lead a happy relationship together.
Please read and reread the paragraph because I won’t mention it again.
What I don’t agree on however, and this is what has gotten me negative backlash for, is lying. I do not like people who lie, no matter the shape or form. In any given context, I think lying is bad and I’d rather hear the honest truth, or nothing at all.
What some people fail to understand is that some people support Uee’s choices for lying, saying that she did so to protect herself, Kangnam and the relationship. Another is that, even though she did all of that, she did lie in the end.
I agree with many of the people, that she DOES have the right to protect herself and protect whoever or whatever it is she wants. What I do not like though, is somebody who lies. Hence why, I decided to go to one of these open forums and input my opinion.
Unfortunately for me, because I feel that lying is wrong, there have been people who state and I quote “that I do not see the bigger picture, and I stand here offended because I live only to hate.”
Excuse me?
How can I hate an idol I’ve supported since their debut in the Korean industry? How can I hate someone who wants to lead a normal life, or love someone they have strong feelings for?
Look. I just wanted to say that no matter what she could have chosen to do, she would have received backlash regardless. I can understand that. There are people out there who just don’t like idols, who just don’t like people being in relationships, and just love to cause drama. I also see that.
My whole point on the issue is that she did have an opportunity to stay quiet, which in my opinion, is probably the best option she had with this whole issue. I’d personally rather have someone hide the truth from me, rather than be lied to straight to my face. How you choose to feel isn’t my problem, nor is it any of my business.
What I strongly disagree on, which I’ve mentioned a few times in this post, is that she lied. Full stop. Black and white. There is no denying. She lied.
I’m not saying I’m going to begin hating on everything Uee does now, cause no. That’s stupid. All I wanted to say, is that at the end of everything, she lied, and it’s just something I can not accept regardless.
Nonetheless, she is now in a relationship and I am happy for her.
What do you guys think of this little issue, that really isn’t so much an issue? Let me know through the comments down below, or through my SNS.
Usual blog posts regarding beauty and other things will be up soon, so stay tuned.
The last post I made seemed to be popular, so I wanted to do another product empties post again. I was really upset, because I actually lost half of my products when I was cleaning out my stuff. I must have mistaken the empty bottles for trash and threw them all straight in the bin before I could take any photos of them, so unfortunately for me, I wasn’t able to get photos of my La Mer soft cream, the Creme de La Mer, POLA Grand Luxe, Albion Skin Conditioner, Sulwhasoo First Treatment Essence, Clinique Moisture Surge cream, Laneige Lip Sleeping Mask or The History of Whoo Whitening Ampoule set.
Nonetheless, I did manage to keep some items and so I will be talking about them here. Prepare yourself for ugly photos, dirty bottles and blurry pictures, because I am a professional blogger after all.
SKINCARE
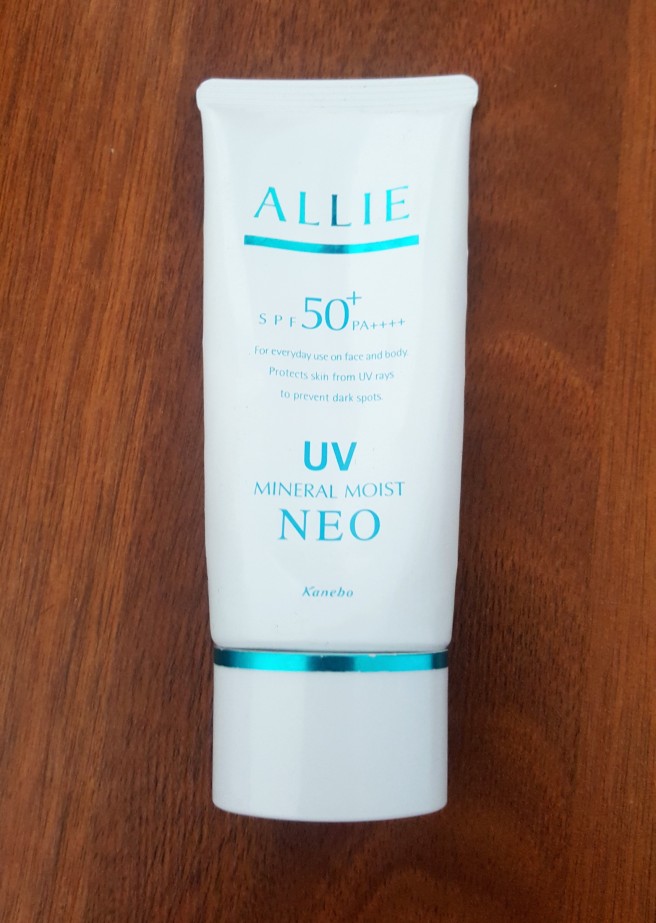
ALLIE Sun block
I mentioned this product many times, and I believe that I did include this in my last empties post. I did end up repurchasing another 2 bottles, which both are now completely used up. I really love this sunblock as it has SPF 50 PA ++++, it’s light weight, absorbs nicely into the skin, gives slight white cast that appears natural on my skin and it’s wearable under makeup. The only problem I encountered with this sunblock is that locally, the prices were initially only $49.95 AUD, but with our ever declining market and dollar strength, prices for this baby are sitting at an average of $55 per bottle. Sure, the price was steep to begin with, but now I’m starting to feel it’s a bit ridiculous.
Would I repurchase? Probably, once the price stabilizes again, otherwise I might have to look for another sunblock that performs just as well as this one (which I can easily find because Allie UV blocks are comparable to Kanebo’s UV Milk/Gel and Innisfree’s Eco Safety IMO).
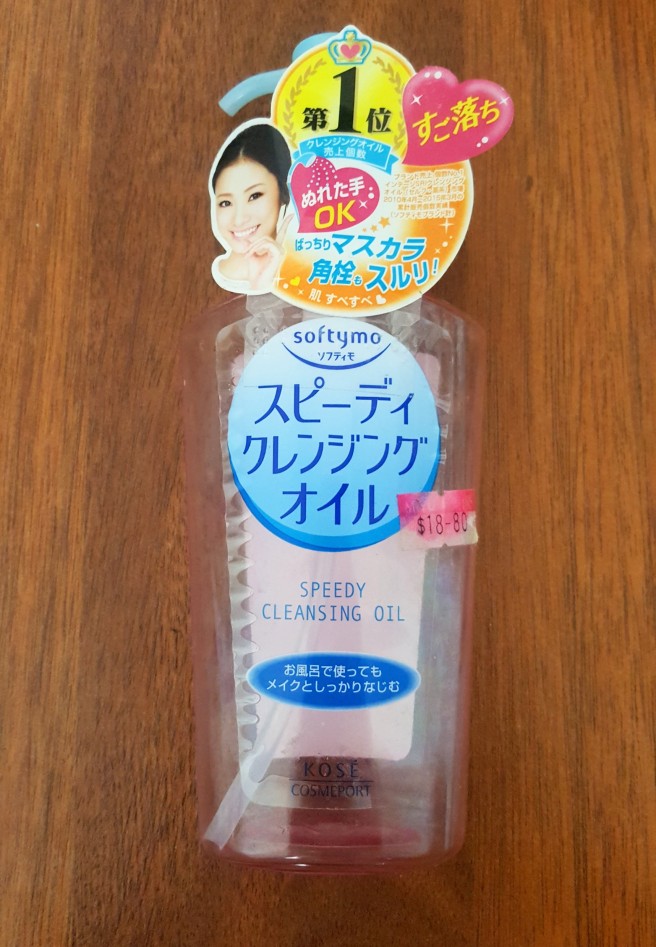
KOSE Speedy Cleansing Oil
A cheap spend, and a decent oil cleanser. Honestly, when it comes to cleansing, I don’t really care what product I use, provided it does the job effectively, is pH balanced suitable for the skin, and it is easily accessible to me. It’s very rare I stick to one brand of cleanser or cleansing oil, since I generally don’t care about it too much.
This cleansing oil isn’t an exception to my feelings of cleansing. It does the job very well, it’s gentle on my skin, breaks down makeup and emulsifies easily. I can’t really fault it at all, and it’s pretty cheap as well.
Would I repurchase? Sure, if this is the cheapest oil out in the AB market. Otherwise, I’d just go for the cheaper option, if there are any.
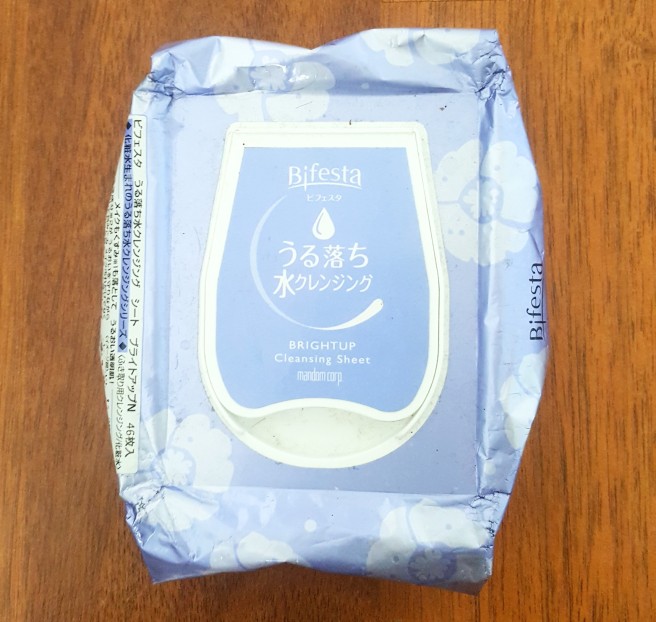
MANDOM Bifesta Cleansing Wipes – Bright Up
These have been a GOD SENT product. You guys know I absolutely DESPISE cleansing wipes, but these ones are enriched with the same liquid found in their micellar water, so I’m never worried whenever I use these sheets. I even wrote a whole blog post about them, which you can read about here.
Would I repurchase? I try not too, only because having cleansing wipes at the disposal can encourage laziness when it comes to skincare, but everyone knows that I’ll end up grabbing another package eventually.
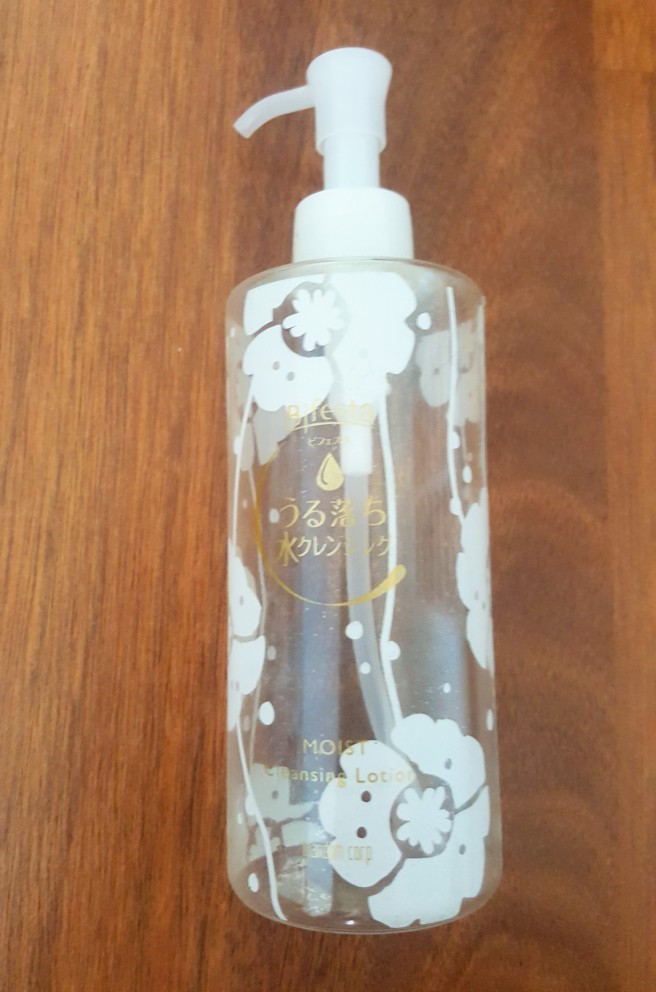
MANDOM Bifesta Cleansing Lotion
Here starts the blurry photos.
Just like the wipes, I wrote a whole blog post on this product, so you can have a read of it here.
Would I repurchase? I like this micellar water, but I do prefer the Acne specific one from this range, so not necessarily repurchase the moist version, unless the Acne specific isn’t available. Actually, let me rephrase this.
I would repurchase depending on stock availabilities, in this order:
Acne Care
Bright Up
Moist Up
Q10 Enriched
So, to clarify, if the Acne Care isn’t available, then I would repurchase the cleansing water in the Bright Up formula and so on, so forth.
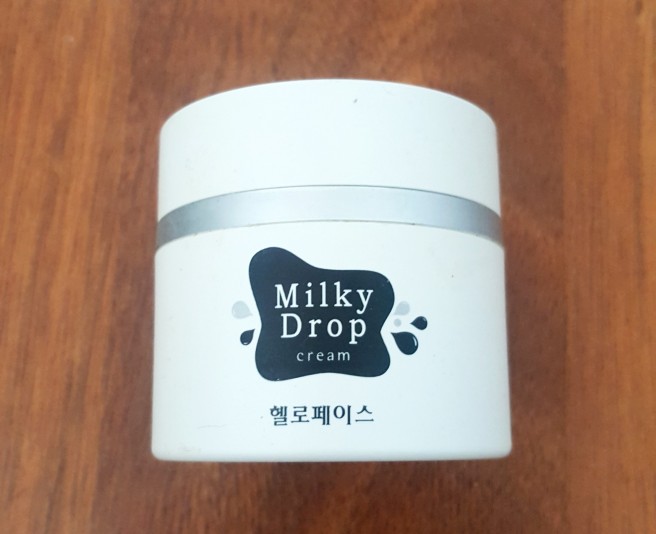
HELLO FACE Milky Drop Cream
Remember that DoctorCos branded cream I talked about ages ago? This utilizes the same droplet technology where the cream produced liquid droplets upon application to provide extra hydration for the skin. I found that this cream was a bit harder to absorb than the DoctorCos cream, but provided the same level of hydration as the DoctorCos.
Would I repurchase? Since this cream provided my skin with whitening care, that helped with hyper pigmentation, I would say I might repurchase it, since whitening care is so damn expensive. Otherwise, I’m inclined to go for different creams since there are better alternatives to this one in particular.
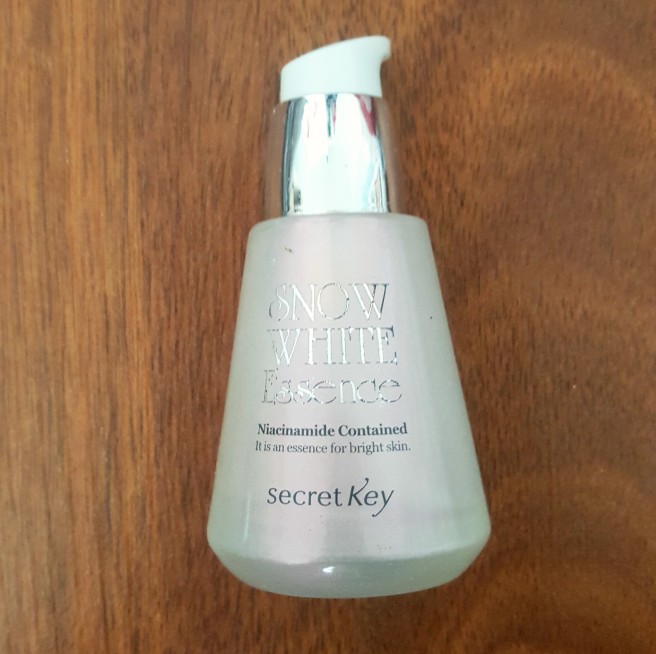
SECRET KEY Snow White Essence
I heard about this product back when I was working customer service in cosmetics retail, from a Muslim customer who only shopped skin whitening products. She basically told me this was THE product to help brighten the skin, and really stop your skin from getting darker. Since, back then, my peers and a few customers made me feel uncomfortable with my skin tone, I went out and bought a bottle to really “fix” my skin tone.
To clarify, I actually like my skin tone now; I think dark skin, light skin and everything in between are equally beautiful, and for me to think otherwise back then, was a bit stupid. Nonetheless, this is truly an example of how peer pressure or even bullying (if you can call it that) can affect someone’s mental state.
Back to skin care, I used this bottle hoping for a whiter and “more beautiful” me, but this bottle did absolutely nothing other than make my skin appear overly compensated with sebum.
Would I repurchase? HELL NO.
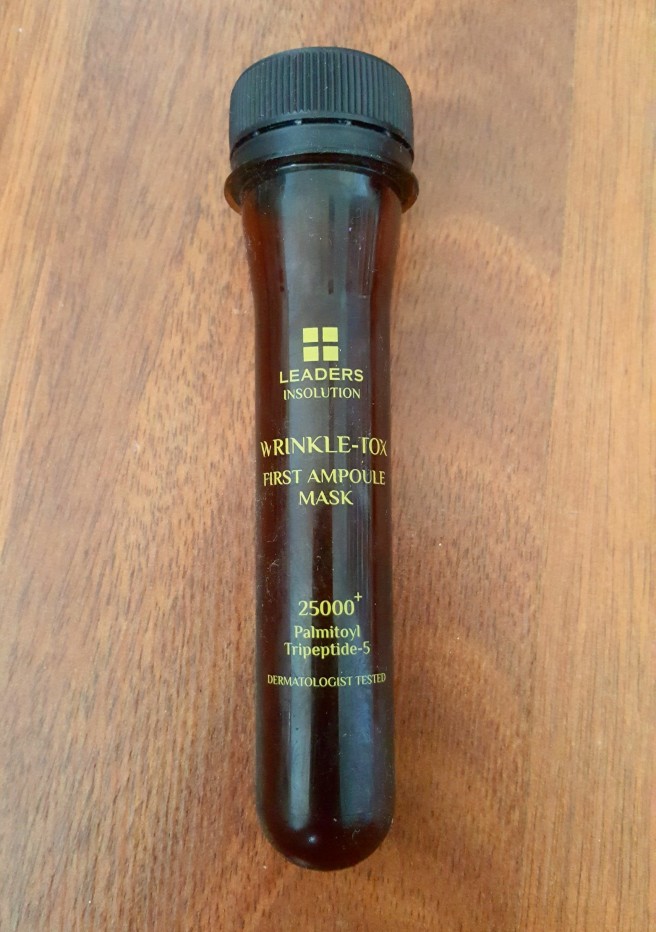
LEADERS INSOLUTION Wrinkle-Tox First Ampoule Mask
I was planning to do a separate blog post on this mask alone, but I lost my photos when I was doing my monthly clean out of images in my phone. Mistakingly, I deleted the mask images along with older blogging content that has already been published, so there goes my hard work down the drain.
Oh well.
As far as this mask goes, it was in this vial-like bottle seeped in serum and wrapped around a stick. The whole mask and design aspect itself was very interesting and nothing like I’ve ever seen before. Using the mask however, my skin was itchy and red upon application, and remained red for the rest of the day. The morning after, my face blew up with pimples.
Would I repurchase? Oh my god yes. I love getting allergic reactions and pimples all over my face.
if you can’t tell this is sarcasm, then you need to turn your locations on so we can chat.
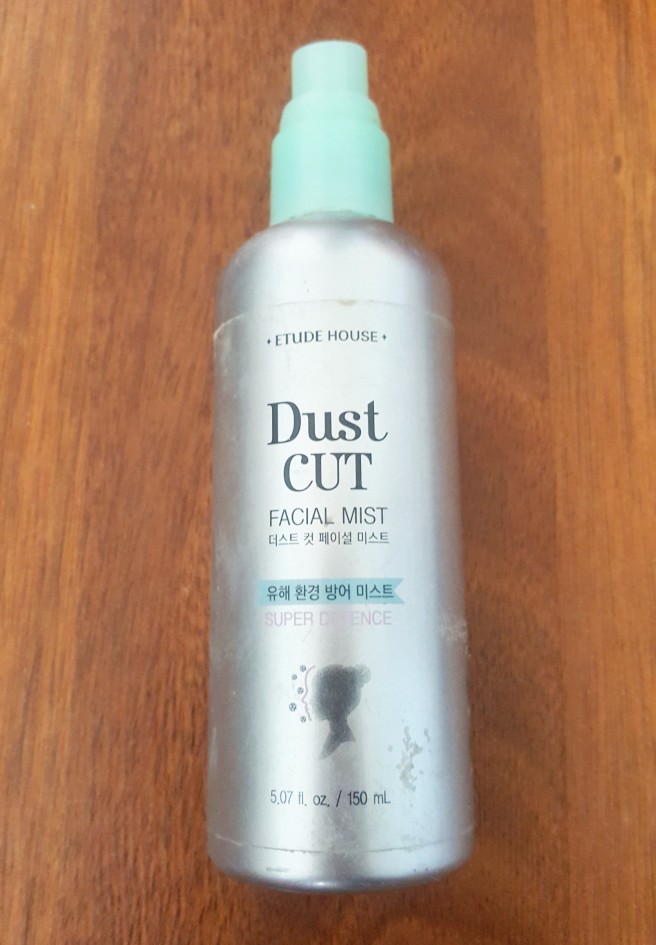
ETUDE HOUSE Dust Cut Facial Mist
I don’t know why I bought this facial mist to be honest, but all I can remember was that the bottle was retailed for $35 AUD. Now, I’m not sure about you guys overseas, but here in Australia, Etude House is NEVER above $30, no sir. I say, that even though I don’t find it expensive at all, if you’re going to purchase a drug store branded item, then you’d expect to be paying drug store prices, right?
Overall, the mist itself was ok, albeit a bit dry on the skin. I mean, it’s to be expected if your mist claims to “cut the dust”.
Would I repurchase? Not at that price. Otherwise, I might get me another bottle.
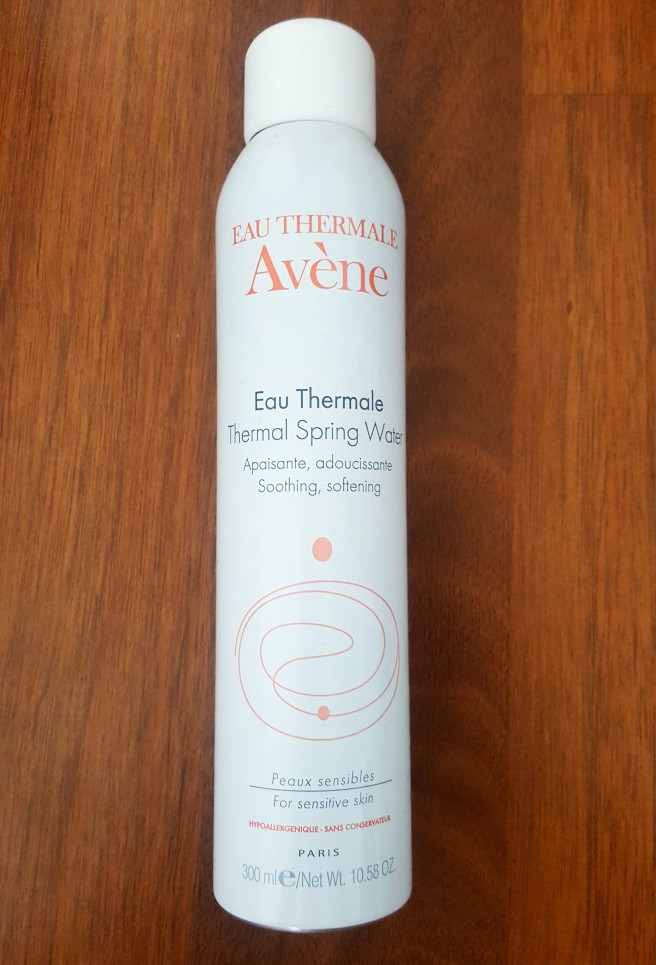
AVENE Eau Thermale
AKA canned and compressed water.
What is there to say, other than Avene is EXPENSIVE here in Perth, and that it literally is water in a mist can.
It’s good for sensitive skin. BECAUSE IT’S WATER!
It helps to smooth and soften the skin. BECAUSE IT’S FUCKING WATER!!!!!!
Need I say more? Oh BTW I got the largest size and spent $59.95 AUD on it, so other than it being just a can of water, it’s also ridiculously priced. Who in their right mind is OK with spending close to 60 bucks on a can of water?
Would I repurchase? I’m notorious for spending and wasting money on unnecessary shit, but this is a bit too much. I’d rather buy a carton of carbonated water and use that as bathing water, than to repurchase this facial mist.
INNISFREE Jeju Volcanic Pore Clay Mask
Cult favorite, my favorite. I have a Whoo clay mask that costed me a whopping $90 that honestly, performs less than what this mask can offer, and the Innisfree only cost me a quarter of the price. It’s a clay mask, it tightens, softens the skin, brightens the complexion AND it tightens pores. Needless to say, everyone can get their hands on it.
Would I repurchase? Of course; it’s cheap, effective, and it lasts a long time.
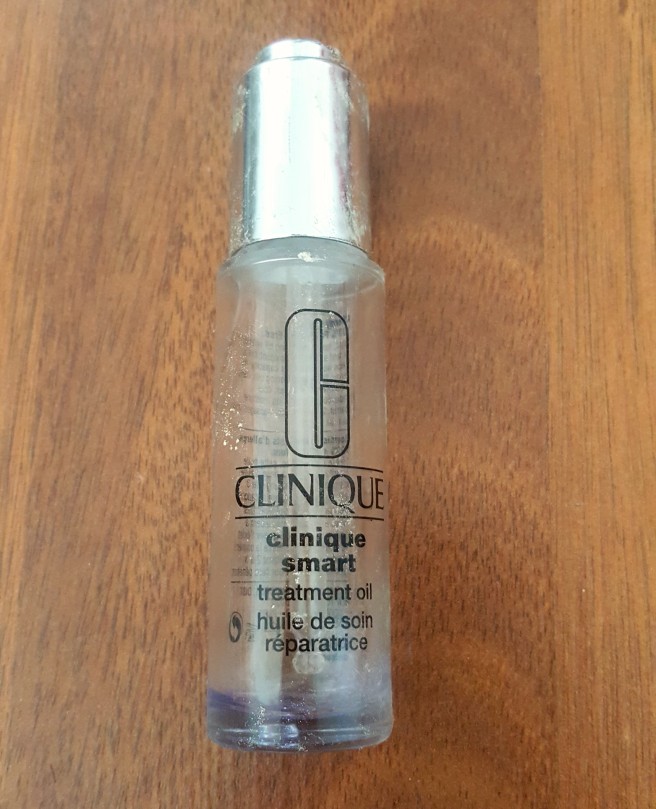
CLINIQUE Smart Treatment Oil
This is the beginning of dirty packaging as well.
I was pressured by the staff there to purchase a bottle. She literally made me feel like shit, left tissue paper tearing all over my face after I received a facial over there, and disregarded the fact my skin was literally burning when she applied not only a clay mask I’m allergic to, but also a toner that literally causes my skin to bleed. That stupid bitch made me look bad, feel bad, then came and said a few words that would have had me permanently removed from the shopping centre if I didn’t buy this oil. I was absolutely FUMING, but I couldn’t have myself permanently removed; I worked INSIDE the centre.
I bit my tongue and purchased the damn oil. What else could I have done? Sure, I could have told a few people and got them to help me out, but with no solid evidence, it would be word for word. A formal complaint written in handwriting would also have done nothing. Calling the store manager on her pasty ass? Again, word for word. Ain’t there a single thing I could have said or done to fix the issue.
Nonetheless, that’s in the past and I was stuck with a facial oil I didn’t really need. What did I think of it? Well, it was an oil, and it went on my skin. It absorbed terribly, made my skin congested because it sat only on the surface of my skin, and it smelt really weird.
Would I repurchase? I didn’t even want to purchase it to begin with. It felt disgusting during the facial massage.
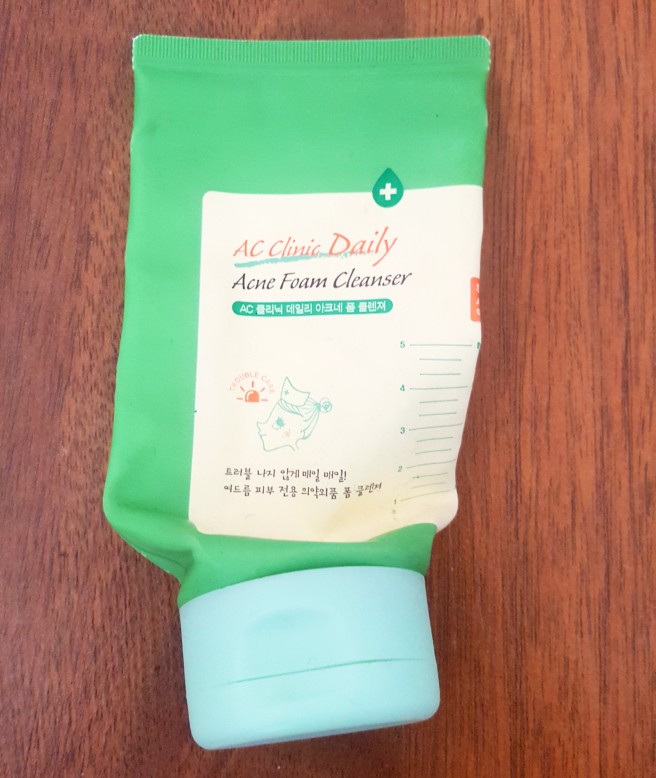
ETUDE HOUSE AC Clinic Daily
If this is old packaging, and the new designs came out a while ago, guess how long I had THIS cleanser for.
Yes, I know this is the older formula.
Yes, I know I should have ridden this from my skin care a long time ago.
Yes, I know I ran the risk of skin irritation.
But, I didn’t get any skin troubles, I used it before the expiry date, given that packaging dates differ from the time you open the product and expose it to air for the first time, and I knew that after using this cleanser, I could compare this to the new AC Clean Up.
Would I repurchase? Well, no, because I can’t now. AC Clean Up cleanser, I would purchase it for Summer when my acne gets really bad. It’ll give me an indication as to how the new formula fairs against the classic I’ve fallen in love with over the years.
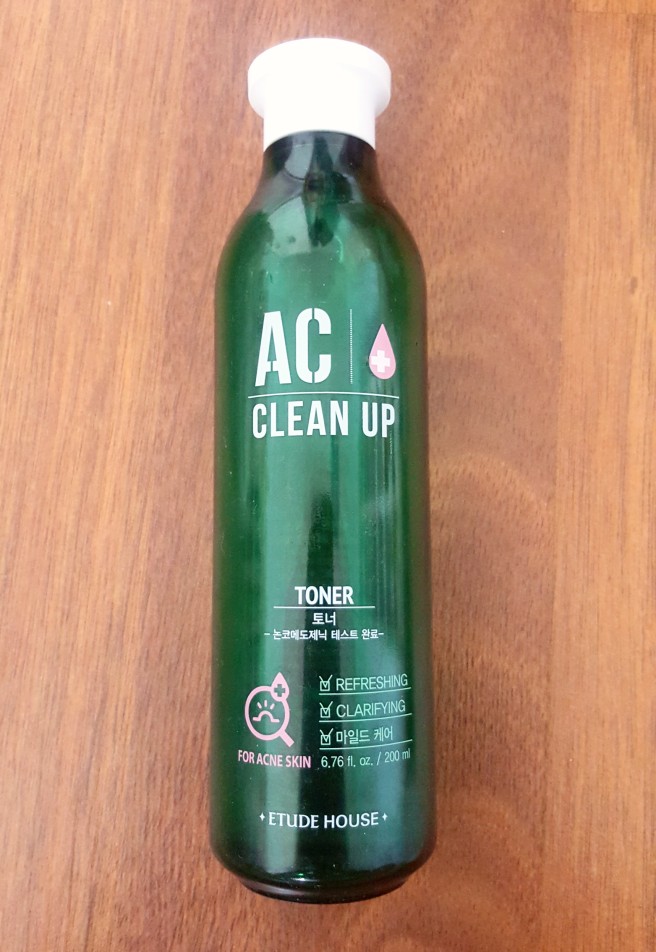
ETUDE HOUSE AC Clean Up Toner
This toner, compared to the original smells less chemically, but still has that medicinal scent to it. Other than that, the pricing point was the same, as so were the functions and capabilities.
Would I repurchase? Since I’m using a BHA active now, I’m not 100% sure I can, but otherwise I would, since it helps with acne and isn’t drying like other acne skincare products in the market.
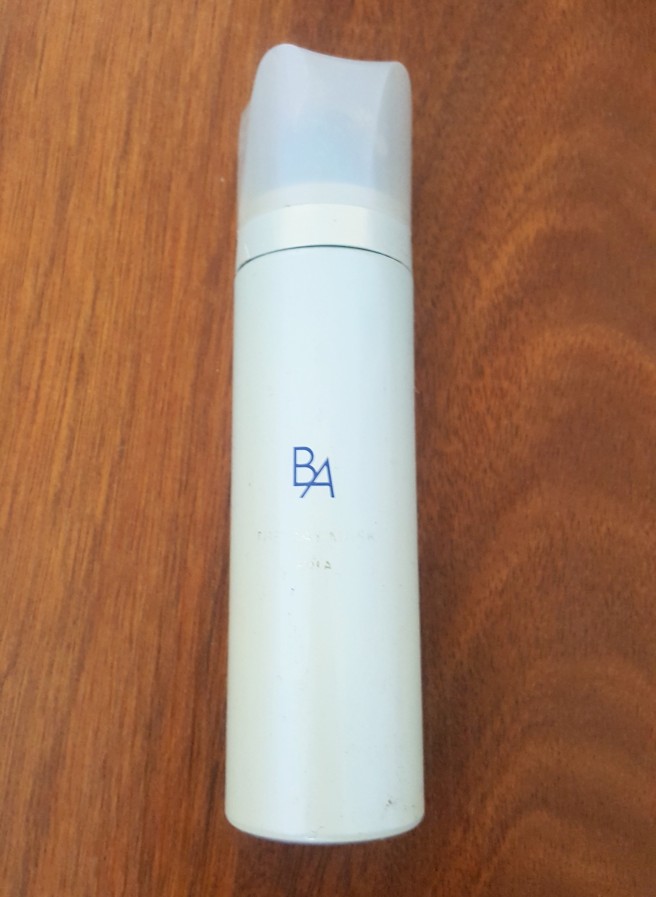
POLA White BA Day Mask
Probably the ONLY high end product I was able to retain in my empties garbage.
This mask is somewhat of an extra step, and dedicated for all the extra people in the AB community. This is like a serum, except it is to be worn AFTER applying your moisturizers and such. That said, if you skip out on lotion, cream or whatever you use to keep your skin well hydrated, then relying on this mask is a huge no no.
I found that this mask was quite moist, kept my skin looking brighter, plumper and more glossy than if I were to skip this product altogether. However, being that BA is a collagen based product and intended for those with aging skin, it didn’t click in my mind that this wouldn’t be compatible with my dehydrated, yet, oily skin type at the time of usage. It goes without saying that this mask left me really oily after 3 hours, and it didn’t help my makeup if worn underneath. As a stand alone product itself though, I found this day mask was beautiful on the skin, even with the oily complexion, and it did keep my skin feeling hydrated throughout the day.
Would I repurchase? Since I can get my hands on POLA for a lovely price of $0, I don’t need to purchase it at all, but I did actually spend my money for this bottle, since my regular supplier of POLA didn’t have any Day Mask left, and I had to venture out to buy one for real. At a starting price point of $205 AUD, I think the fuck not.
HAIR CARE
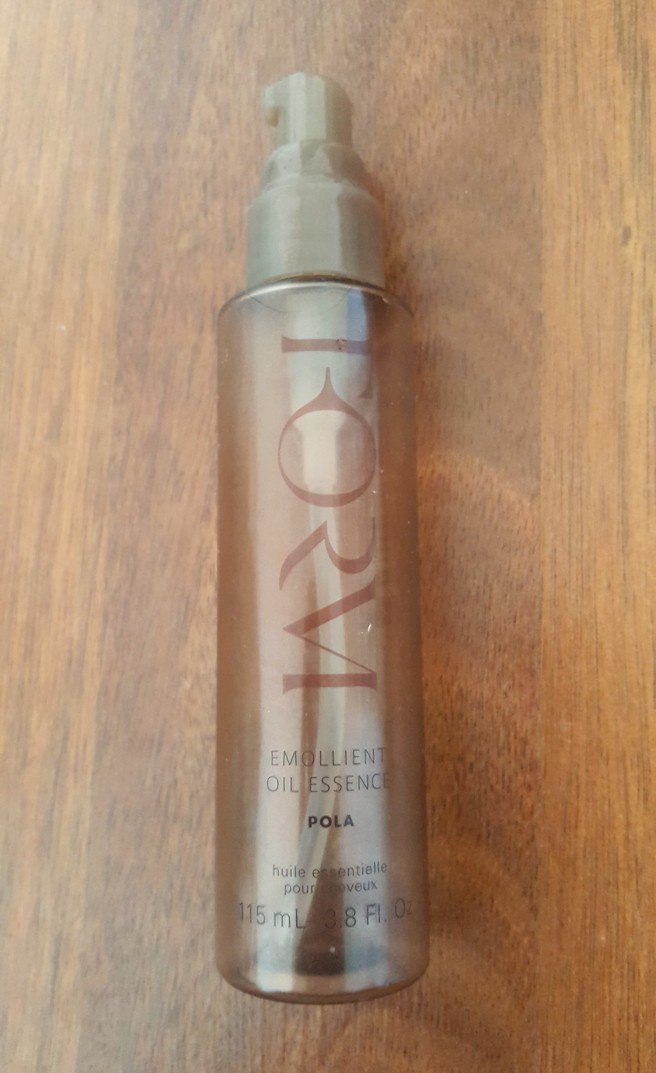
POLA Emollient Oil Essence
This hair oil is the most pricey from what I’ve tried so far, sitting at $35 AUD per bottle. It isn’t cheap, but it worked wonders for my severely dry and damaged hair. I could wear the oil essence alone as a leave in, or use it as a pre flat iron treatment to coat and protect the hair itself. The scent is florally and light, which I liked, and the essence was thick enough to have an effect on my hair, but light enough that it didn’t weigh my hair down.
Would I repurchase? Definitely. It’s the best oil I’ve used to date, and I don’t think Western brand hair oils live up to the quality that POLA hair care provides.
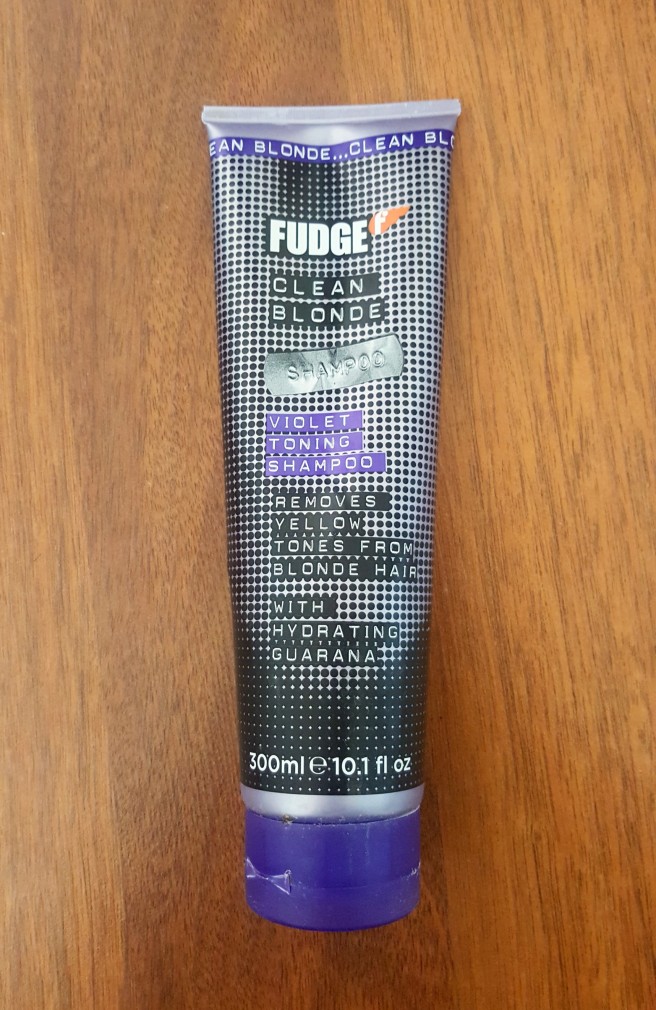
FUDGE Clean Blonde Shampoo
Back when I had grey hair, this is all I used to retain the ashy color. It works wonders for people who want to achieve the ashy tone, or for those who want to maintain ash grey or silver hair. The only downfall is that the formula of this shampoo strips your hair completely of any moisture, leaving your hair dry.
Would I repurchase? Now that my hair is brown, I see no need for this shampoo. Maybe if I decide to dye my hair again, I’ll consider it.
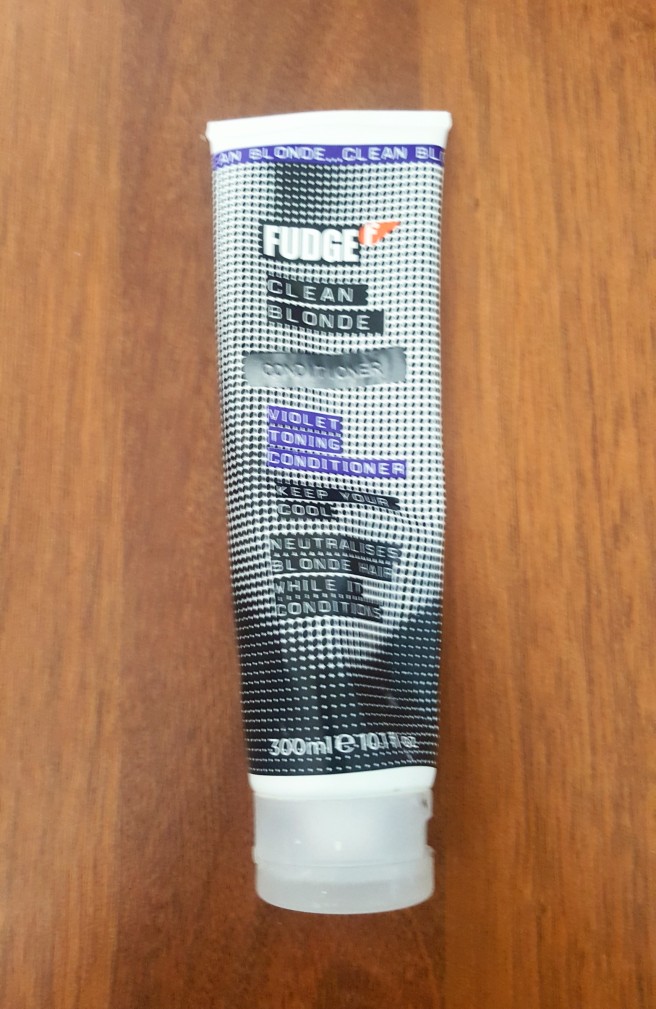
FUDGE Clean Blonde Conditioner
OK this photo is unusable even for my standards.
Clearly I went for the blurry aspect of this photo. It’s my aesthetic.
Nah I’m joking.
I actually suck.
This conditioner is purple toned just like the shampoo, and is designed to act as a second wash of purple to achieve less brassy toned hair. However, the color is so light, that this conditioner does nothing to address hair tone whatsoever. On top of that, the conditioning capabilities of this product are so sub par that you’re better off wasting money on the cheapest hair conditioner you can find at the drug store.
Would I repurchase? I’d rather spend the $25 on food to sustain my hunger rather than this.
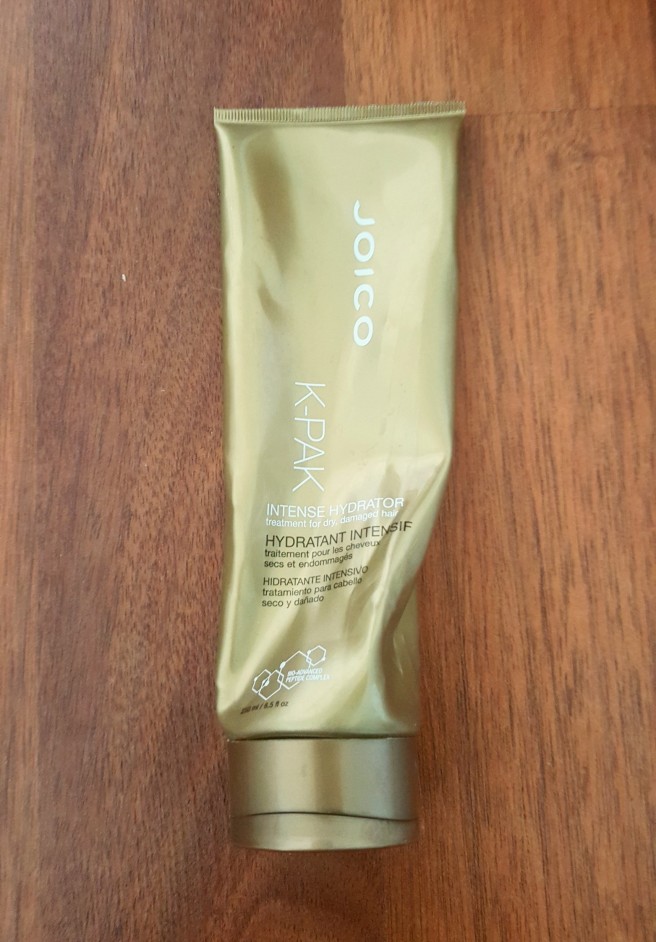
JOICO Intensive Hydrator Treatment
I actually asked the sales assistant to help me find a rich hair mask to keep my hair feeling softer and less frizzy, in which she suggested this product to me. Going home, I had high expectations for this hair mask, since the only other hair packs I liked were from Ichigami and Fino. This mask performed worse than those two, and left my hair feeling the same after washing, as if I were to not use it at all.
What a waste of $39.95.
Would I repurchase? No, and I’ll happily stick to my Fino for $19.95.
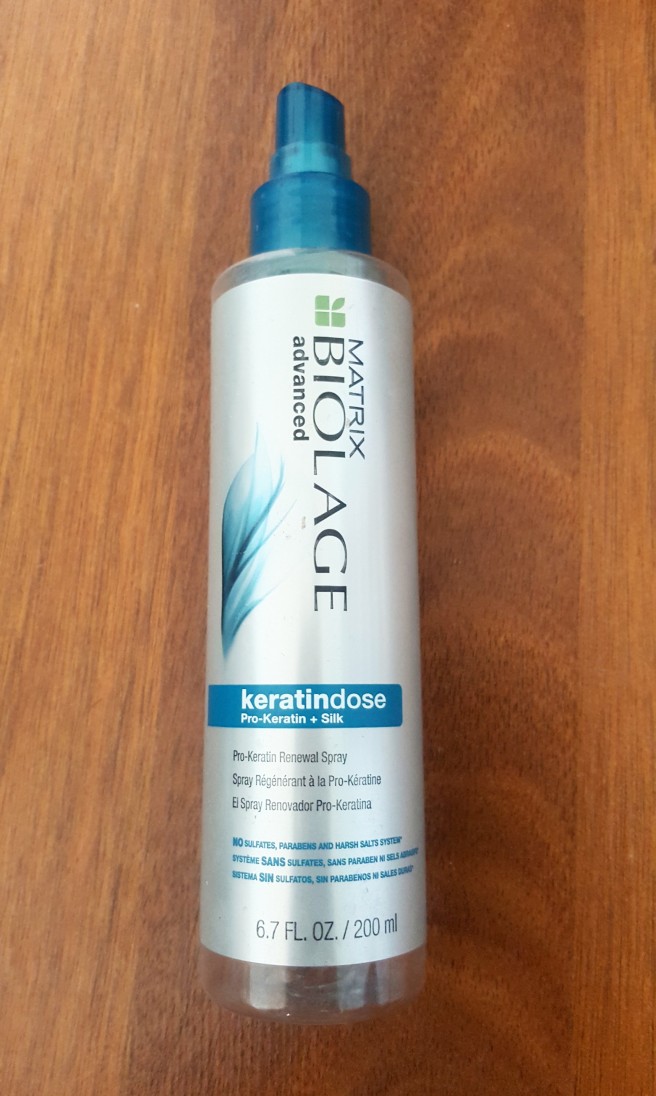
MATRIX Biolage Advanced Keratindose
Unlike other keratin hair care products, this one didn’t smell like I pissed all over my hands. That immediately was a good sign. The same lady that suggested the shitty hair pack, also suggested me this.
As a product, it really kept my hair feeling a little bit healthier and more glossy in appearance. I hate the spray nozzle though, since the keratin essence was too thick to be sprayed on in a fine mist. Nope, the keratin came out in jets of liquid. Overall though, not a bad product, but nowhere near $35 good.
Would I repurchase? If this ever went on sale, then yes. Otherwise, I’ll probably go back to smelling like piss again, with the cheap $6 Korean keratin essences.
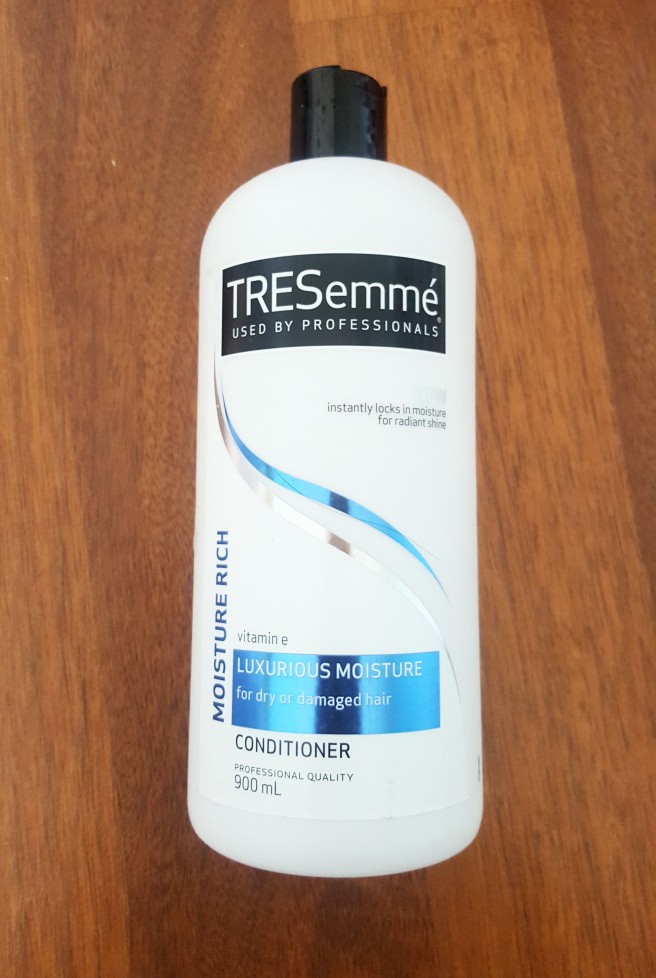
TRESEMME Luxurious Moisture Conditioner
Everyone uses Tresemme because it’s big, cheap and easily accessible. I only bought a bottle because the AB stores didn’t have any Ichikami in stock, and that made me real sad. Nonetheless, as a fill in conditioner, it lasted longer than my Ichikami (I use a LOT of conditioner) and it worked fine too.
Would I repurchase? Sure, if I can’t find a replacement to Ichikami since it iS ALWAY S OUT OF STO C K
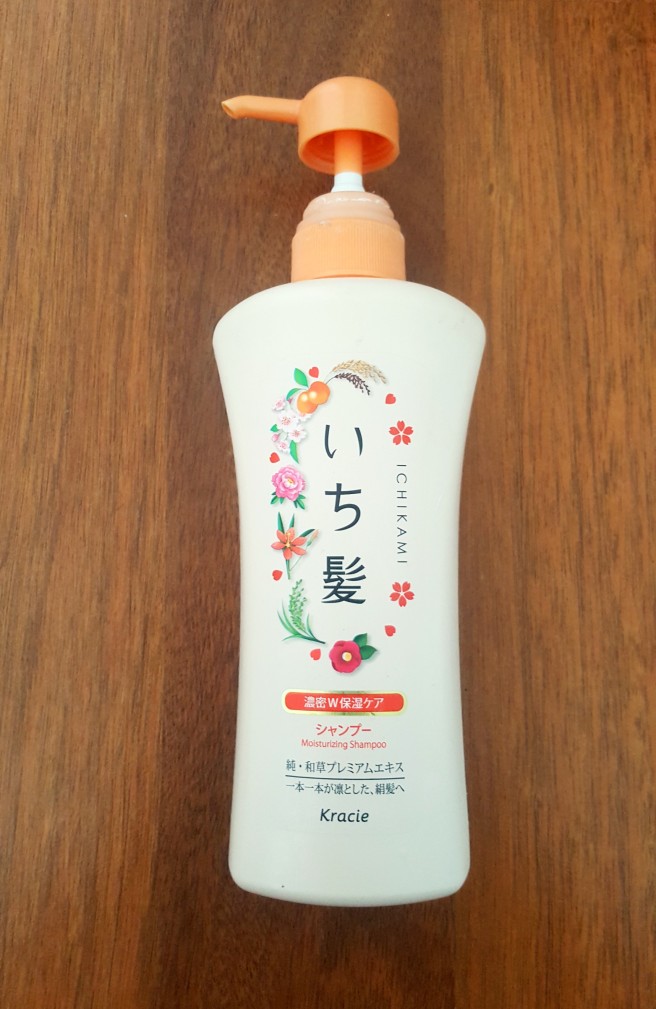
ICHIKAMI Moisturizing Shampoo
Speaking of the devil, this shampoo is my go to. It smells nice, works nice, and it’s $25 per bottle so nothing too crazy. I can wash with this and literally go without conditioner if I’m running late, and my hair won’t feel dry at all.
Would I repurchase? I don’t know, ask the AB stores when they’re getting their stock back.
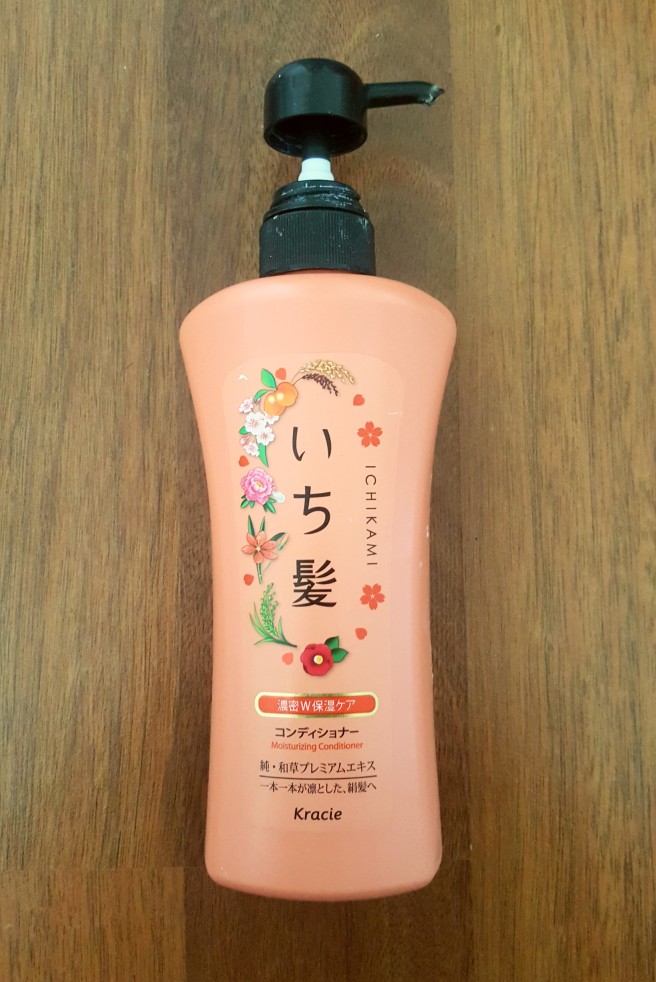
ICHIKAMI Moisturizing Conditioner
Just like above, this works great, smells great and costs the same amount of money. There really is nothing else to say about it.
Would I repurchase? Yes.
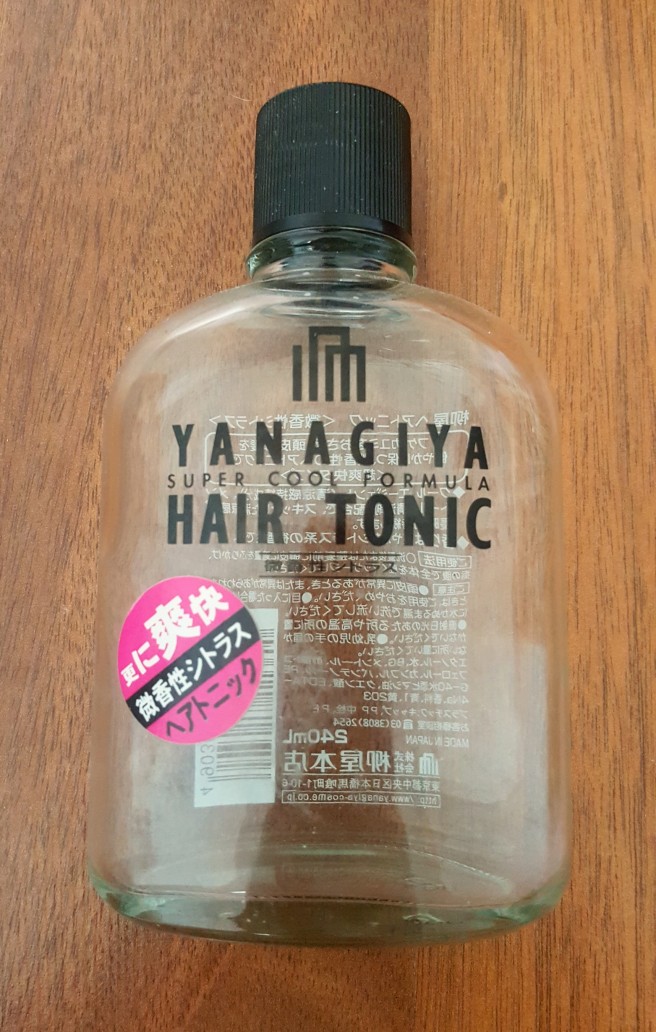
YANAGIYA Hair Tonic – Super Cool
This tonic is supposed to stimulate the hair follicles to effectively keep your hair healthier and grow stronger. I bought this only because my head gets really hot, and I wanted a tonic to cool down the scalp in order to make my makeup last longer throughout the day. This tonic did just that.
I guess as far as it’s “actual” claims goes, it did alright. Nothing fancy.
Would I repurchase? Depending on my tolerance to heat in the upcoming summer, I might have to think about it.
MAKEUP
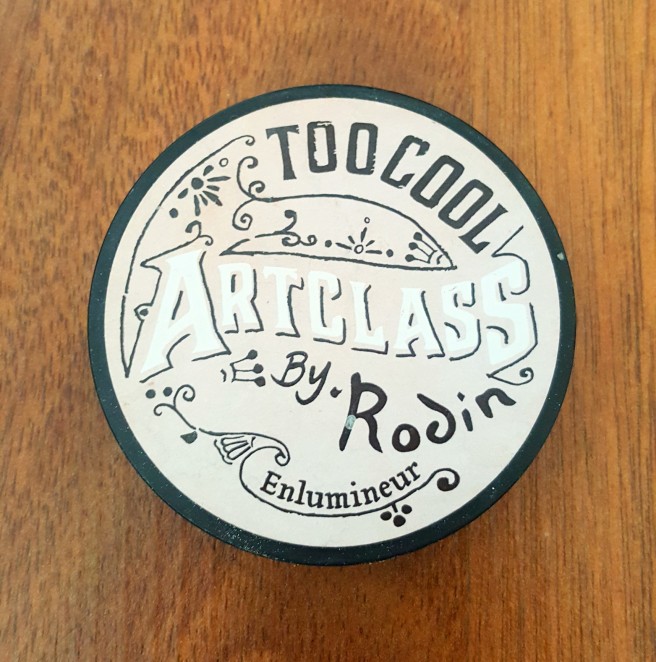
TOO COOL FOR SCHOOL Artclass By Rodin – Illuminizer
I don’t know if I can give a fair review on this since I was only able to use the highlighter 5 times before I accidentally dropped it and it smashed everywhere in my bathroom causing me to cry heavily for he next 300 years as I reflect back in my life trying to pinpoint where I went wrong as a child.
As far as a highlight goes, it worked beautifully from memory, the colors were really nice and the shimmer was natural since it wasn’t strewn with chunky glitters. Just like the contour, the powder itself is very smooth, and glides upon the skin for a beautiful yet skin like finish.
Would I repurchase? Well I have to, since I never even got to try it out properly.
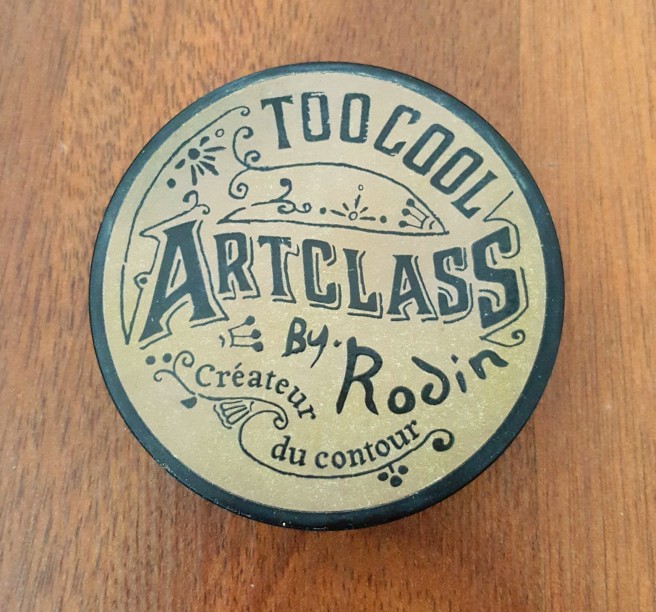
TOO COOL FOR SCHOOL Artclass By Rodin – Contour
Speaking of contour, this is probably the 6th one I’ve used up completely since I first got my hands on it. I love contour, probably a bit too much. That’s probably why I always look muddy in real life, whenever people see me.
Would I repurchase? Well, I only used 6 so far, so I don’t know…
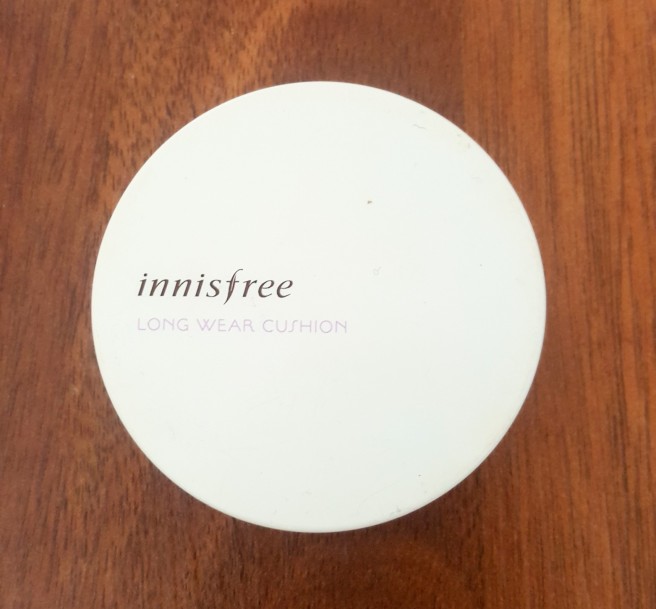
INNISFREE Long Wear Cushion
This is the OG cushion and not the new formula. I’m yet to try it out and see whether it’s the same thing or something completely different, but from what I had here, the cushion itself was nice, matte and stayed on for a very long time.
Would I repurchase? I actually want the My Cushions, you know, the ones with the hella fancy packaging where you can custom design your own case to make it match your cushion aesthetics. If I can get that, then yes I would love to buy another one.
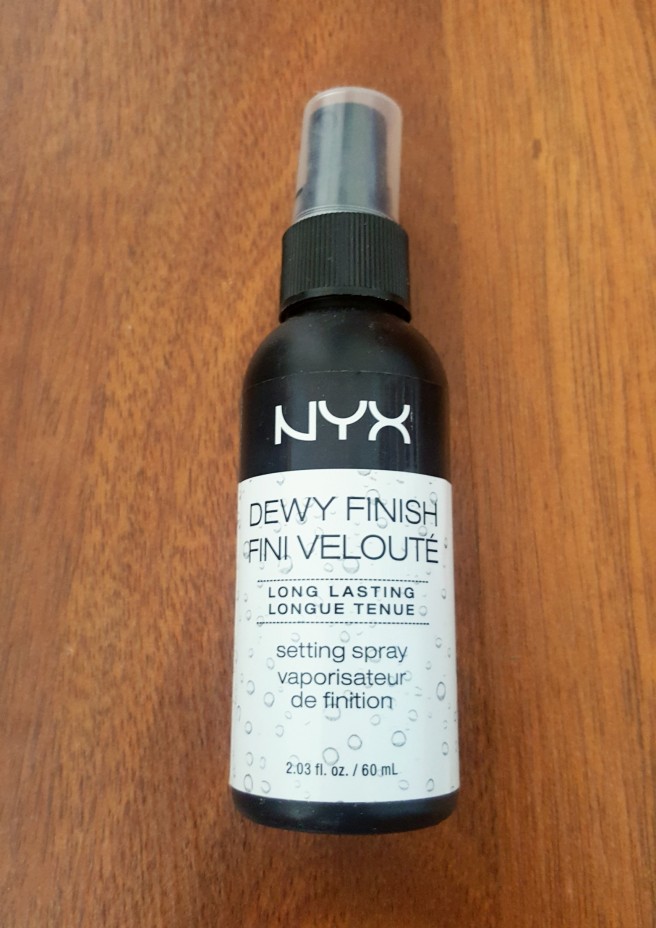
NYX Dewy Finish Setting Spray
I have been sleeping on NYX for so damn long, and I’m so mad with myself because NYX is actually so damn good! This setting spray included.
I can’t say much, since this literally goes over the top of your makeup, makes your base real glossy and sets makeup into place for the entire day.
Would I repurchase? It’s a couple of dollars, fuck the Too Cool For School one I was using before.
If you enjoyed this post, don’t forget to like, subscribe to my blog and share with your friends and family. What are some of your empties you’ve tried thus far? Have you used or are currently using everything I have here on this blog post? Let me know down in the comments below, or through my SNS, which you can find below.
I’ve tried it all; soap bars, shampoo, dishwashing liquid, face cleanser, heck, even actual brush cleansing solution. Nothing really kept my brushes cleaner than what I’m going to share with you now. In saying though, you’ll probably be like “Anthony, what the fuck?”
Keep reading to see what I use to keep all my brushes and sponges free from makeup and dirt.
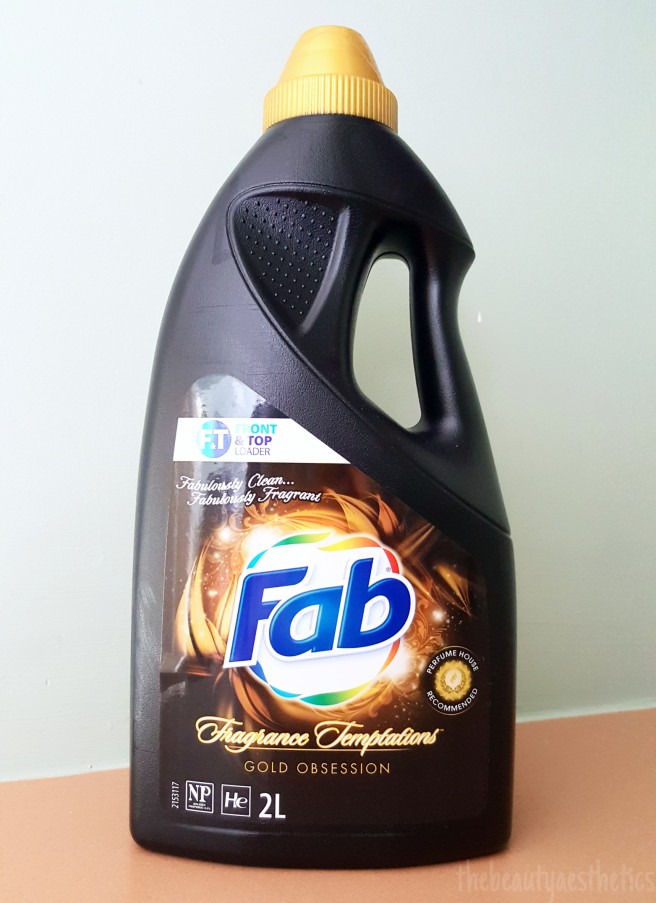
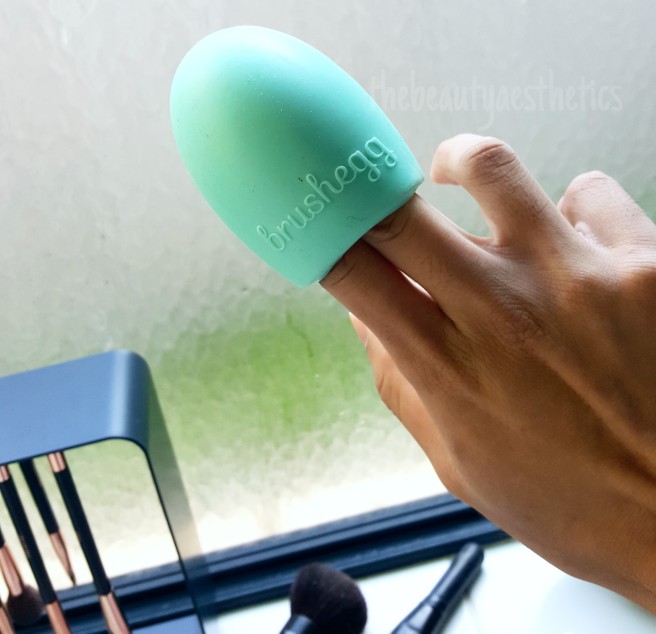
My secret ingredient for brush cleansing, is literally hot tap water, a silicone brush cleansing device (the one with all the grooves) and…
HOUSEHOLD LAUNDRY DETEGENT
I’ve tried using powder as well, and it works just fine. I would suggest dissolving in warm water, before adding it to more water, as the powder particles can get a bit annoying after a while. I don’t deal with that shit though, so I use liquid instead. Plus, this one here smells absolutely divine.
Yes, you read right. I remember one time, I got makeup all over my clothes, and I tried everything to get it off, and the only thing that remove the makeup from my stained clothing was laundry detergent, so I decided, why not use them on my makeup brushes as well?
Keep in mind that washing liquids of all types have a pH higher than 7; in chemistry terms, these agents are referred to as alkaline. When mixing an alkaline with an acid, you can neutralize the two agents to (hopefully) produce a neutral pH rated substance.
With this in mind, I always wash my brushes and sponges with a laundry detergent, and follow with a quick wash using a sub acid cleanser for extra precaution.
I don’t measure the quantity of liquid to water. I literally pour and guess the amounts each time, depending on the amount of brushes or sponges I am washing. For reference though, I usually try follow the recommended 1 cap-full of detergent to 5L of water guideline, as I would usually with my clothes.
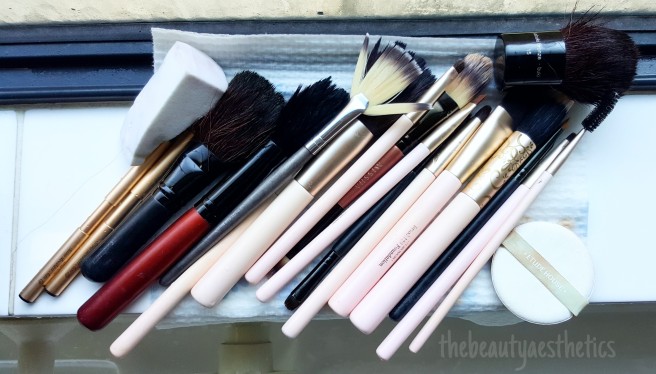
Sitting at the bathtub, with my laundry detergent and hot water ready, I prepare all my makeup tools to the side, ready for washing them all.
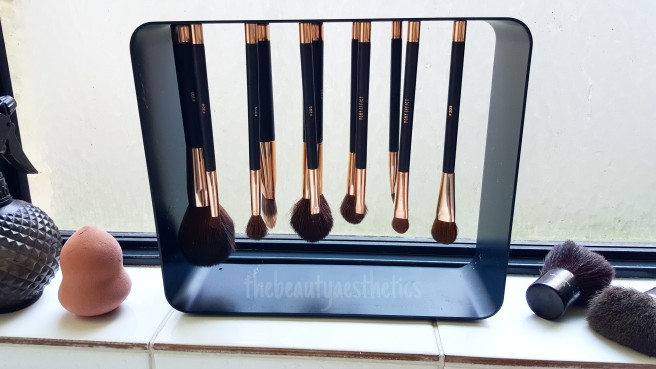
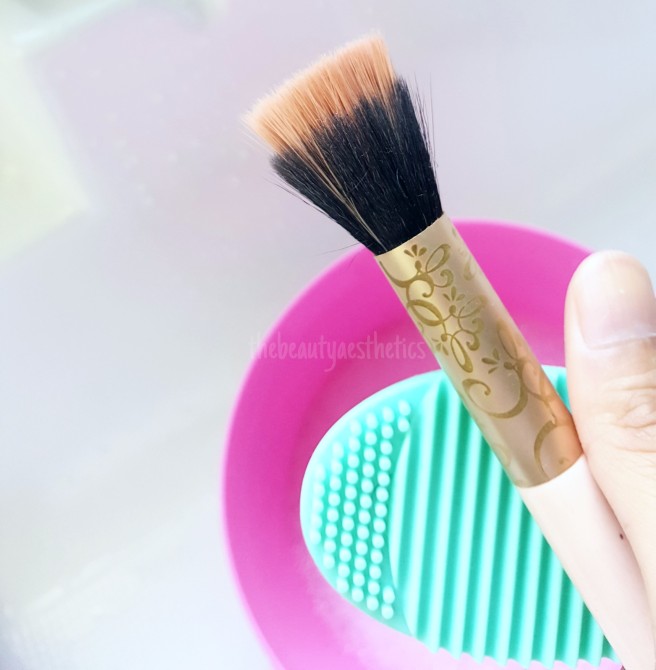
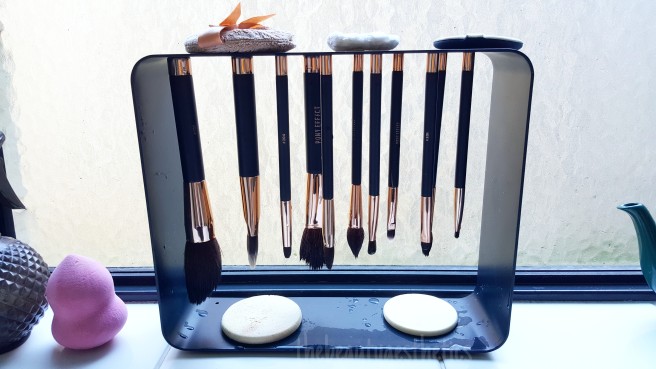
I actually love the design aspect of the Pony Effect brushes being magnetic and able to hang upside down for perfect drying.
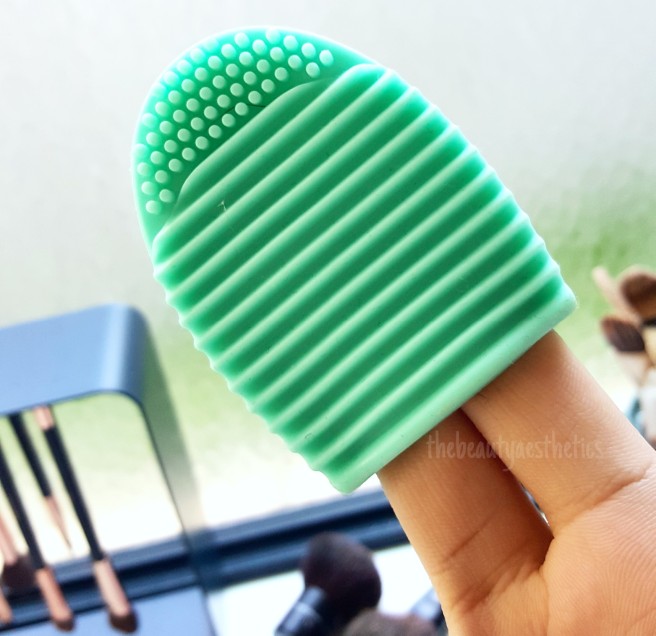
I find that washing your tools with just soapy water and your bare hands can prove to be difficult, so I picked up a cheap brush egg with grooves built in, to allow my brushes to be thoroughly scrubbed down and free from makeup, dirt and impurities.
I’m pretty sure I got this for $3 somewhere in Perth, but I could be mistaken. This gadget has been sitting in my bathroom for so long now, I forget the exact price I purchased it for.See the grooves it has? There are straight indents perfect for your larger brushes like foundation and powders, and tiny cylindrical indents perfect for your smaller brushes like brows and shadows.
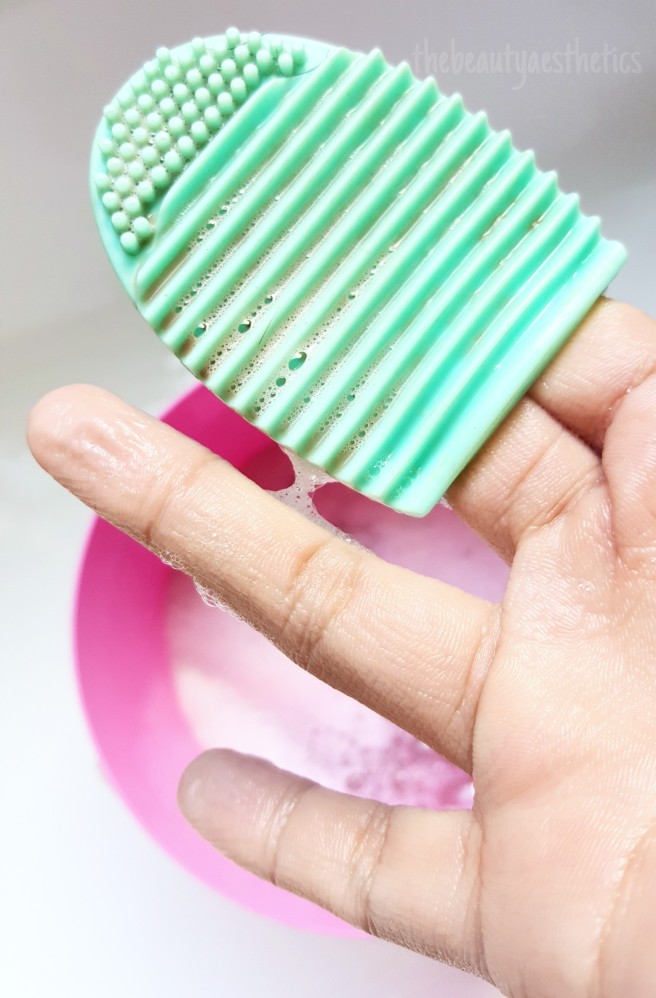
From here on out, it’s as simple as dipping the brush in the water, giving it a quick swish around and scrubbing the living daylights of them all, to ensure they’re clean. With the laundry detergent mix though, I’m spending no more than 30 seconds per brush, so cleaning does not take long at all.
To be completely honest, this picture was taken after cleaning only 4 brushes. My fingers get darn pruney very easily.
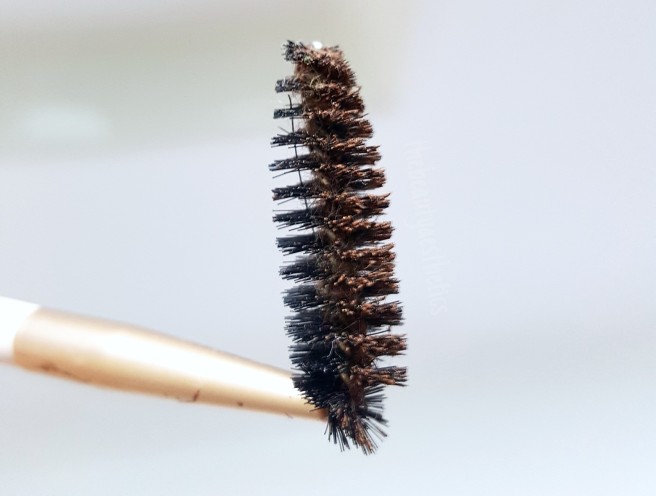
For verification, I put to the test my most stubborn brushes to clean against this laundry detergent mix.
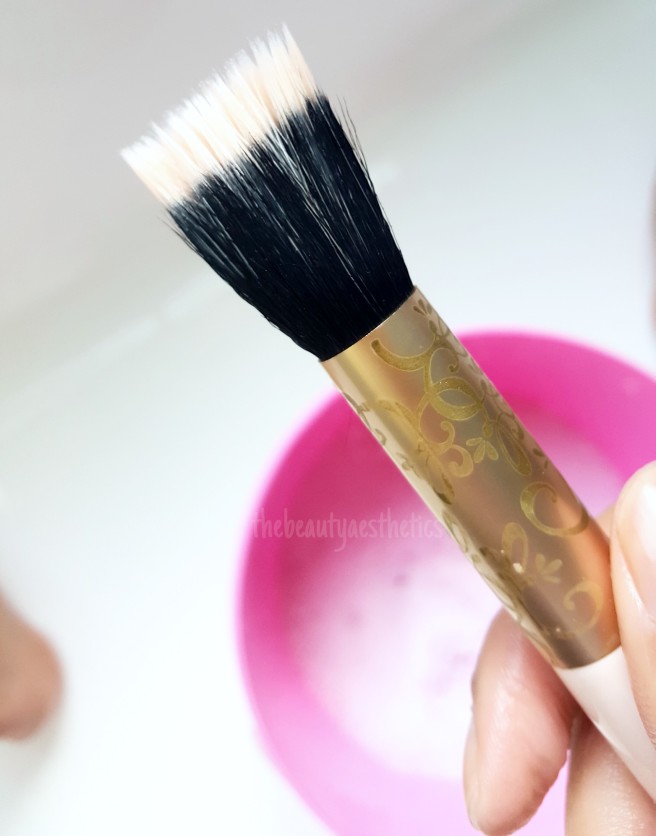
This is the Stippling Brush from Etude House. One of my favorite brushes for applying blush and shading.
I use this brush practically everyday to add blush to my cheeks, and blend out my contour. Sometimes, I’ll even dive right in with foundation if I want to be a little bit extra, or have a lot of time on my hands. My last cleanse with this brush, using a brush cleansing solution from a Western brand (I can’t remember which, but DB sounds familiar) left all my tools stained and not properly cleaned. I thought that this would be a good opportunity to see how it fairs against laundry detergent.
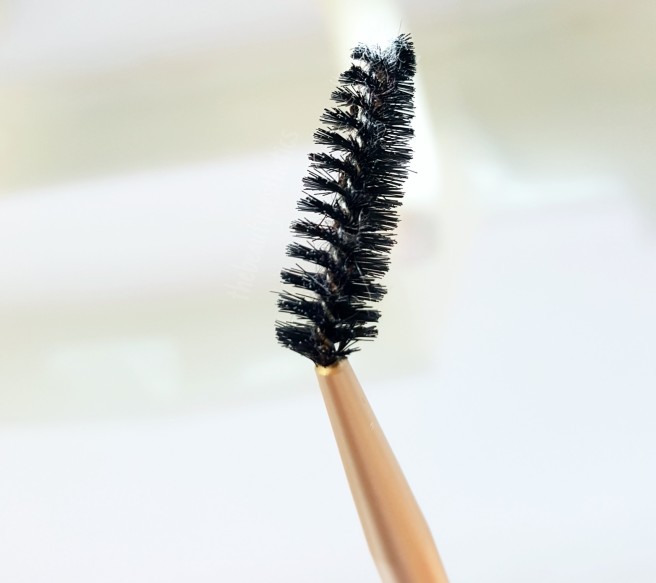
Directly after washing with the laundry detergent.
Though it”s not pristine white, most of the color did come off very quickly, and the water was practically clear giving the brush a rinse after a 15 second scrub. I guess, with brushes used for powder products, they clean almost immediately.
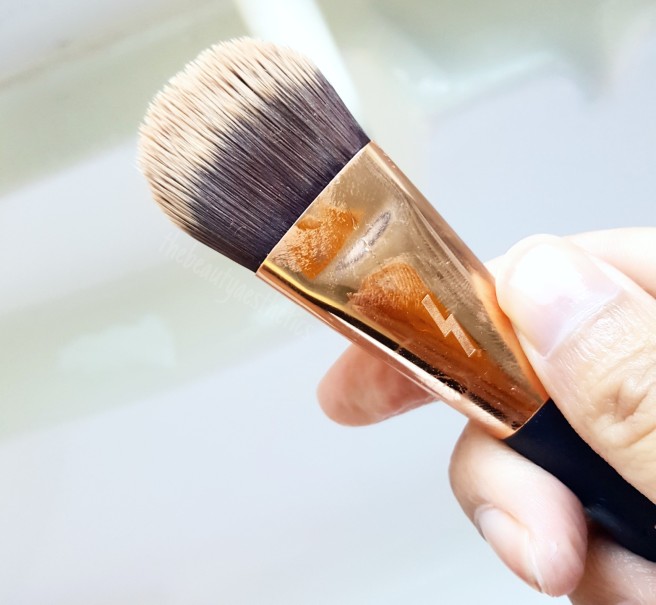
Honesty, my brushes tend to get dirtier than this. Unfortunately for me, this flat foundation brush was one of the more “cleaner” ones.
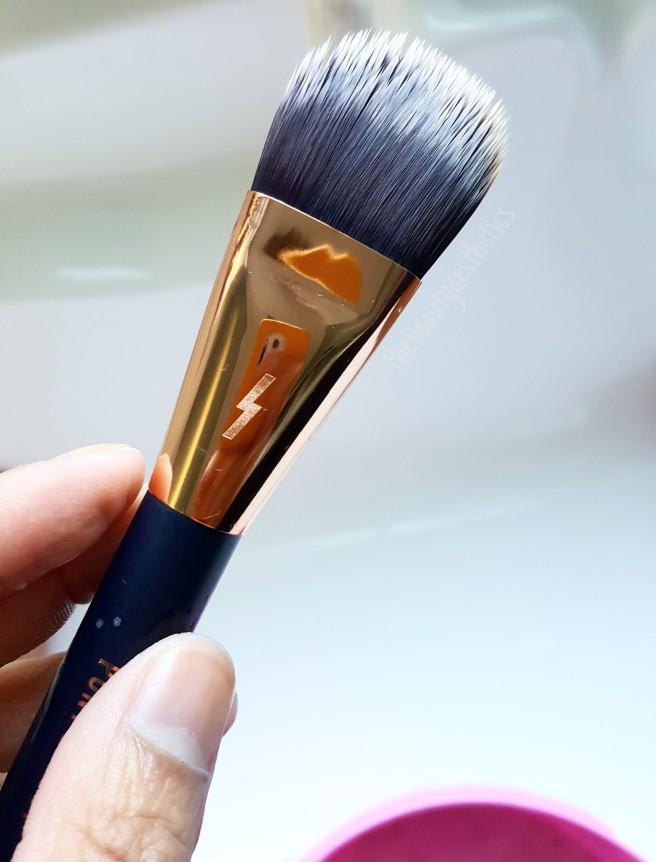
Next up is foundation. I use the Pony Effect Flat Foundation Brush virtually for all liquid products. Foundation, concealer on wider areas of the face, contour, liquid highlight. EVERYTHING. So in saying that, this brush was filthy prior to cleansing. Again putting the laundry detergent to the test, I wanted to see how liquid makeup fairs against it.
A tad longer than powders I must say, but overall, 40 seconds on a liquid makeup brush isn’t too bad either. Again, this photo was taken directly after cleansing with laundry detergent.
Clean. Not a single drama at all with laundry detergent. Had I used a specific branded brush cleanser, I’d probably be sitting at the bathtub for a good 10 minutes just on ONE foundation brush. Don’t even get me started on how shampoo and dish washing liquid works on them.
Etude House makes a good spooly brush in my opinion. As shown here, I like to bend my spooly on an angle for easier usage. Most brushes would snap, but this Etude House one hasn’t thus far.
How about a spooly? Such a weird brush to clean. Whenever I do my brows, I always use a wax to sculpt my brows, either powder or liquid to fill in, and then a coat of brow mascara to change the hair colors. With each step, I use my spooly to brush out the brow hairs into place, and to also blend the makeup. That said, this brush used every day, get’s a lot of gunk on the bristles.
I might have scrubbed too hard, a chunk came off at the top.
Not even 10 seconds, and the brush was clean. What else can I say, other than not to scrub this brush too hard as the bristles might fall off like mine. Oops.
NOW FOR THE REAL TEST
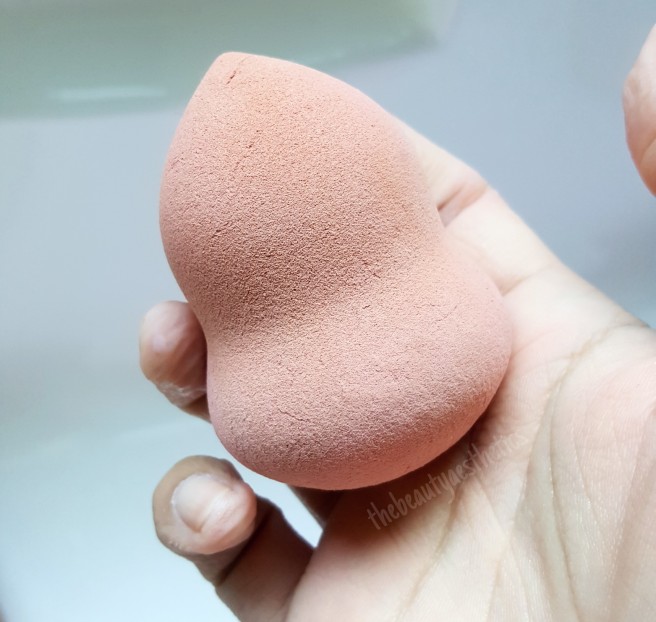
Brushes are easy to clean, but how about sponges? They’re the real devils when it comes to makeup tool washing. Again, just like the brushes, I’ve never actually had any good luck using everything else. Even specific brush cleansing solutions. The beauty sponges always stay dirty, and cushions don’t ever return to it’s former white color.
Too Cool For School marshmallow puff, since the original beauty blender isn’t available here from my knowledge. Speaking of which, I need a new sponge. Any recommendations?
Beauty sponges are one of the most daunting to wash; they absorb all the water and end up not even cleaning the makeup off properly. Even when you scrub and squish the living daylights out of them, they always remain dirty. How does laundry detergent fair though?
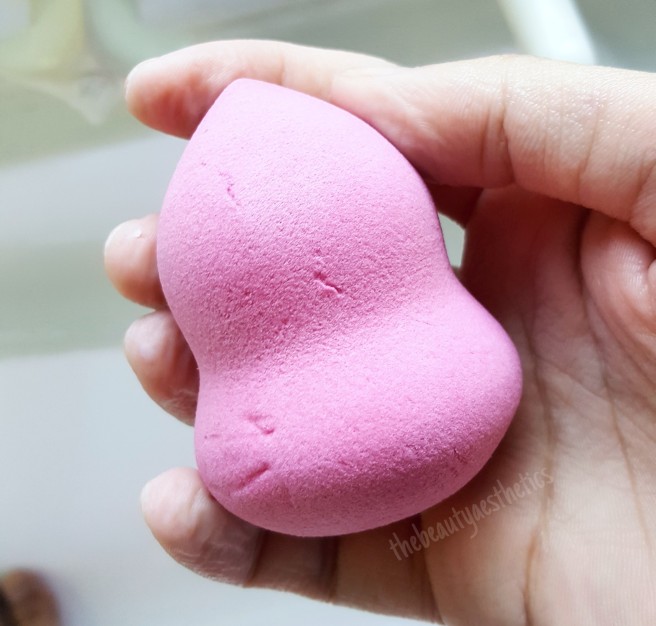
See the cracks? I definitely need a new sponge. Somebody help me!
I forgot my sponge was this shade of pink. Wow. That’s all I can say.
My arch nemesis – The cushions
“Yeah, but sponges are more easier to clean than cushions are.”
That’s very true. I’ve gone and seen many reviews on cushion cleansing, and virtually every single one I saw, nobody could get their cushions looking half decent no matter what they tried.
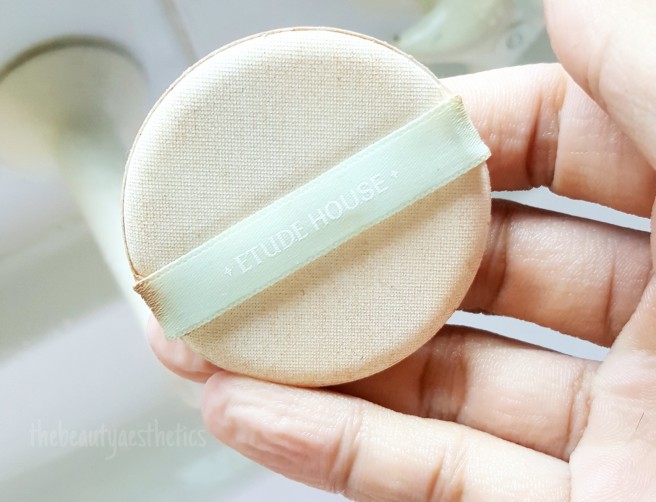
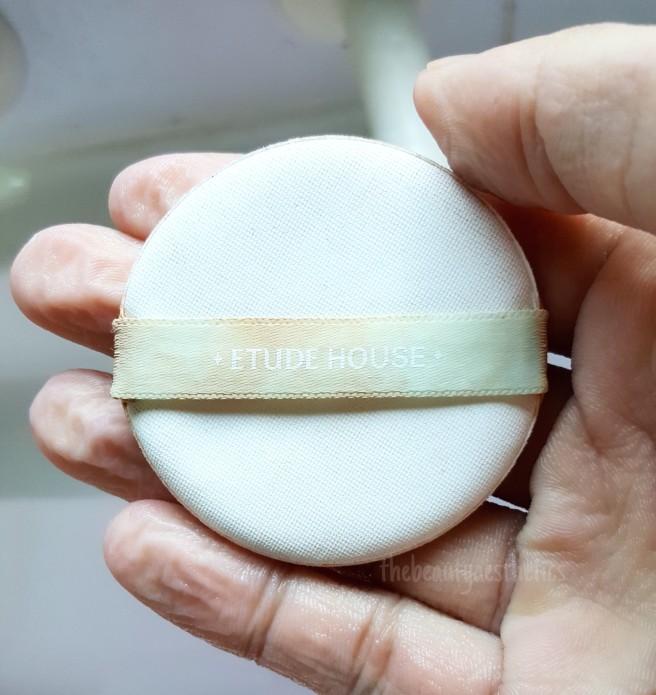
I mean, at least the cushion is white…
The liquid definitely made the cushion white again, which is definitely a relief, and the cushion itself is clean for sure. However, as the image shows, the Etude House band is stained from the foundation, and I wasn’t able to remove it at all. Nonetheless, this is by far the most cleanest I’ve ever got a cushion to, so I’m pretty darn happy.
After cleansing with laundry detergent, I go in for a second cleanse with face wash, and then lay all my brushes and sponges out on some kitchen paper to dry. Except for the Pony Effect brushes. I hang them upside down.
You can tell, most of my brushes are Etude House. They don’t shed at all when you wash them, and they stay feeling soft as ever, so why spend money on brushes when I rarely use them to begin with?The handy magnetic design means water can’t get to the base of the brush, dissolving the glue that keeps the bristles in place. Nonetheless, the fluffier brushes like the powder brushes and the blending eye brushes all shed like crazy, which defeats the purpose I guess.
After all the hard work, and probably 30 minutes in the bathroom, would I recommend using laundry detergent as a cleaning agent for your makeup brushes?
Well, it all depends. Of course looking at it from a skincare perspective, I’m sure we can all agree that laundry ANYTHING should never come in contact with our skin. However, the results do speak very loudly, and I guess, my answer is somewhere on the fence.
Until I can find a good makeup brush cleanser, I guess I’m sticking with Fab.
If you enjoyed this post, then don’t forget to like it, subscribe to my blog for future updates, and share with your friends and family. Do you have any secrets when it comes to cleaning your brushes? Maybe you’ve seen other methods that might be better than laundry detergent. Don’t forget to share ideas, or any feedback through the comments down below, or through my SNS.
They’ve been sitting in my bedroom for quite some time now, so I might as well whip them out and see what stick makeup products can actually do as far as makeup goes. I own 5 Etude House Play 101 sticks, a 3CE shimmer stick that I haven’t used on myself and an I’m Meme Shading stick that’s about to run out.
What sort of makeup look can I create with these products? Keep reading to see what kind of mess I get myself into today.
From left to right: PLAY 101 #3, PLAY 101 #12, PLAY 101 #13, PLAY 101 #11, PLAY 101 #10, 3CE Shimmer Stick #Peach and I’M MEME Shading Stick
Stick makeup isn’t new to the K-Beauty world by any means, but it is unfortunately one of the less popular beauty items in people’s personal disposal. I honestly bought these since each and every one I own were the only available here in Perth, and I felt like blowing my money on crap I didn’t need.
From top to bottom: PLAY 101 #03, PLAY 101 #11, PLAY 101 #12, PLAY 101 #13, PLAY 101 #10, I’M MEME Shading Stick, 3CE Shimmer Stick #Peach
As you can tell from the photos, the products aren’t as pigmented as I hoped for, other than the foundation stick and the shading stick. The others were lacking in pigment. Each formula was notably different as well. PLAY 101 #03, #12, Shimmer Stick and Shading Stick were all creamy in texture, whereas the PLAY 101 #10, #13 and #11 were more satin-powder type.To begin with the makeup, I always start off with a blank canvas, properly cleansed and moisturized. For reference, I use a pH 5.5 cleanser, tone with a pH 4.5 skin and moisturize with a gel type lotion.
Anthony is back at it again with the OLENS Russian Velvet in blue, which I got at Cosmehut for $36 a pair. They are too thick to wear comfortably in my opinion, and I’m hoping that, just like the OLENS x ANNA SUI lenses, these will become thinner over time and be comfortable. For now, I personally don’t recommend them.
I saw a sponsored Etude House video featuring beauty creator Pony, where she drew stripes across her face using the PLAY 101 foundation stick, so I took PLAY 101 #03 and did just that.I found that using this product, using a sponge gave more of a natural application than using a brush since the formula was so creamy. In saying that though, using a sponge only allows the product to apply up to a medium coverage, whereas a brush can stretch the foundation to a medium-full. Using a brush doesn’t allow the product to work well with the skin and emphasizes texture. It also makes the base look very cakey as well. Overall, the finish of the product wasn’t too matte nor too dewy. Somewhere in between, which I quite liked.
With two different shading sticks, I decided to use PLAY 101 #11 on one side, and the I’M MEME Shading stick on the other.
Beginning with the PLAY 101 #11, I applied the contour shade as per usual, but had to use 3 layers altogether just to get some color payoff. The overall tone was way too orange in shade for the product to be used as a contour, but I managed somehow.
I did the same with the I’M MEME StickJudging by the photo, you can immediately tell that the I’M MEME Shading Stick is way more pigmented, and has better color payoff. I only needed a single layer to achieve a contour.
In saying that though, the formula is extremely creamy, and thus, blending out for precise contour proved to be difficult. This can ultimately be fixed by using a brush and being careful; all I had no energy or effort for.
With contour done, I decided to do the same with the two blusher sticks; PLAY 101 #13 on one side, and PLAY 101 #12 on the other.
PLAY 101 #13 was sheer upon application and had fine gold shimmers throughout the product. Since this stick applied smoothly with it’s powdery-satin texture, it made my skin appear fairly smooth. However, blending the product out practically made it disappear. It was fairly disheartening.
In person, you can barely make out the blush color if you pressed your face against my cheekbones. On camera, yeah not a single trace of color at all.
PLAY 101 #12 was my hopeful product, since the formula was creamy type, and the color was noticeable upon application. However, just like the latter, this product blended out into almost nothing. At least in person, you can make out the color on the cheeks, but on camera, you can’t really see anything at all.
The last two sticks were the highlighters, which I was super keen on trying. I love me some highlight, especially cream type as they offer you natural glow that can either be worn alone, or be used as a base for your powders which strengthens the overall highlight.
Following suite, I decided to use PLAY 101 #10 on one side, and 3CE Shimmer Stick #Peach on the other.
PLAY 101 #10 was extremely brittle with it’s powdery texture, so chunks of the stick kept breaking off on my cheek. It was so damn infuriating to use and I really didn’t like it from the get go. The product was also strewn with chunky glitters which wasn’t appealing in the slightest. Overall, blending wise, it worked decently so I was at the very least, able to buff away the chunks of the stick sitting on my cheek bones.
I really don’t like 3CE much as far as their makeup goes, so I wasn’t expecting much when I was trying this shimmer stick.
However, to my surprise, it performed pretty darn well. The formula is on the creamy side, but blends out like a dream. Rather than chunky glitters, the shimmer stick has pearl pigments that actually make the skin appear as if it’s glowing.
After trying out the stick products, I finished off the base makeup by setting everything with a bit of powder, adding nose contour using the I’M MEME Shading Stick and filling in my brows.
For extra trials, I wanted to see how the blush sticks performed if they were to be used with a shadow brush and applied directly onto the eyelid.
With 6 layers, I used a small dense shadow placement brush to apply PLAY 101 #13 onto the entire upper lid, and halfway on the bottom lid. Since the pigment was weak to begin with, I wasn’t expecting the color to really peek through even with a brush, and I wasn’t wrong.
Using a shadow placement brush and PLAY 101 #12, apply the cream to the outer and inner areas of your eyes with preferably, 4 layers since the color wasn’t showing up at all.
I tried using the PLAY 101 #11 on the outer corners, but again, the color was way too sheer, so I opted for a dark taupe eyeshadow instead and placed that on the outer corners to contour the lid, and add color variation. I then set the rest of the eye with translucent powder just because the PLAY 101 sticks were creasing and moving around.
Since I wanted to at least finish off an eye look, I decided to draw a winged liner to tie everything into place.
Just to be extra, I added 3CE Shimmer Stick #Peach to the centre of the lids, inner corners and bottom eyelid for shimmer, and it performed excellently with just a single layer.
With that, finishes the eye look (unless you want to curl and add mascara as well) and gave me enough information to come up with a final judgement on the stick type products.
Overall, I am so dissatisfied with what I used today. The contour products were lacking on both sides since they were too orange, and the PLAY 101 #11 was just too sheer to even be seen on the skin with a single layer. At the very least, the I’M MEME Shading stick was somewhat useful.
The PLAY 101 #12 and #13 were products I sort of had expectations for, which ultimately let me down in the end. They blended away to nothingness with a sponge, and didn’t show up very well with a dense brush. I can’t say anything positive about them, other than the #13 being pretty in shade if you looked at it from it’s packaging.
The PLAY #03 was surprisingly decent as a foundation when used with a sponge, The only fault is that the coverage isn’t the best, and you’d better not risk looking cakey if you’re using a brush.
The 3CE Shimmer Stick #Peach actually blew my expectations out of the water. I fell in love the moment I started blending it into my skin with my sponge, and when I used it on my eye lids. The color is beautiful, the highlight itself is very natural, working alone for a beautiful glow, or as a base for your powder highlights. Out of everything I tried today, I would only recommend you buy this one, since it performed well.
Have you tried the PLAY 101 sticks or stick makeup before, or are intrigued as to why I don’t like them? Maybe you own some stick products that I might like. Let me know down in the comments below, or through my SNS and tell me your experiences with Stick Makeup. As usual, if you enjoyed this post, then give it a like, subscribe to this blog for future updates, and share with your friends and family.
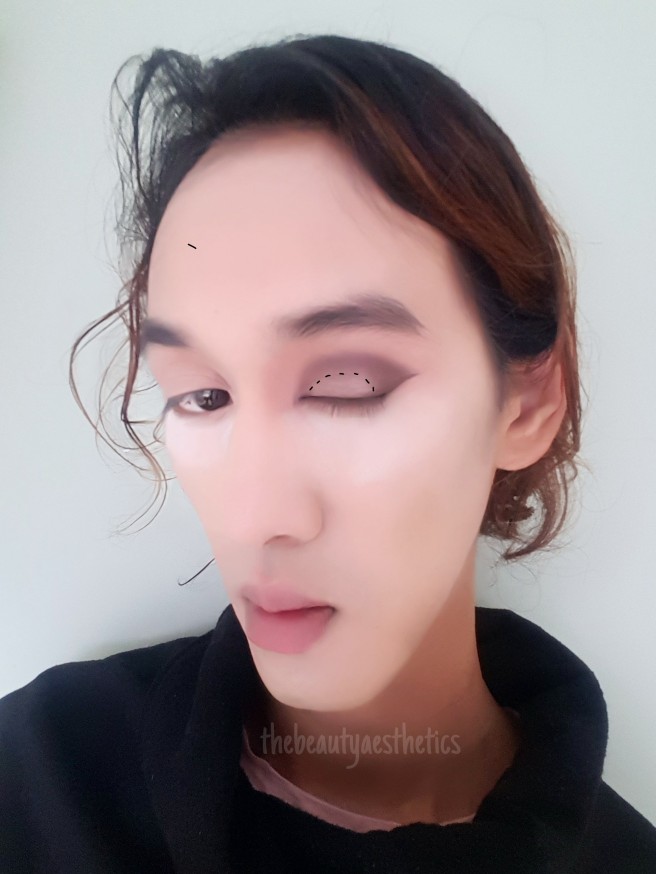
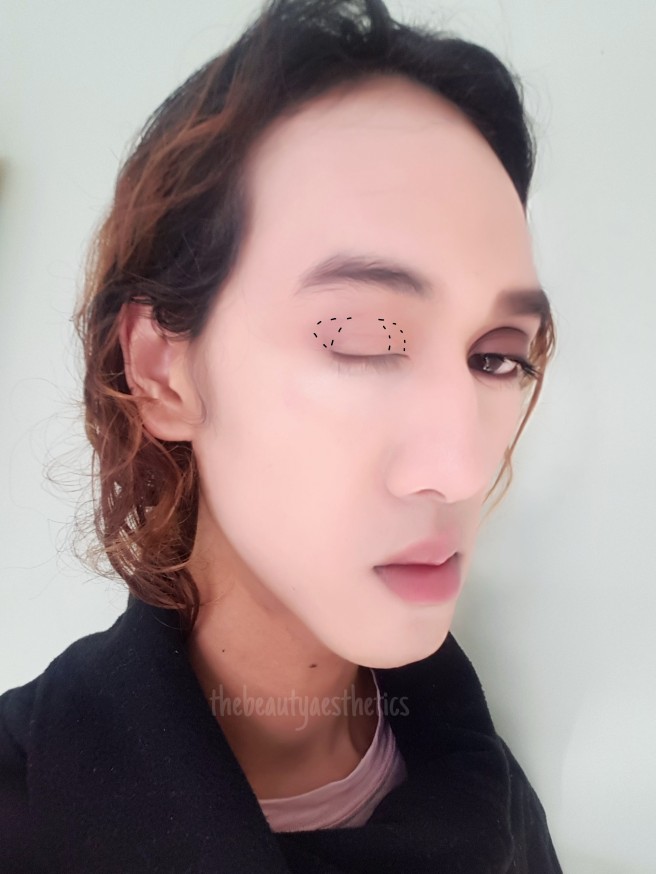
Throwing away the idea of the rosy pink makeup in my last attempt, I went only for the red light concept with the natural one side, and full glam on the other. Again, with Krystal of F(x) as my inspiration, I decided to reattempt the Red Light makeup.
Is there really a need for me to say that I CLEARLY DO NOT own this image NOR DO I CLAIM COPYRIGHT, or is that already a given?
I have to stress that I am NOT a professional makeup artist, nor have I received an ounce of training whatsoever, and so I kindly ask you not to expect much at all.
STEP ONE: Start off with a clean and well moisturized face. For the full Krystal effect, have only one contact lens in the eye you are going to do the heavy makeup on.
The natural lighting was weirdly changing every 5 minutes, because here in Australia, winter is undefined. It’s either oddly sunny, heavily raining with clouds scattered throughout the sky, or both at the same time. With that said, hopefully some pictures aren’t brighter than other ones.
As far as skincare goes, I always wash my face with a pH 5.5 cleanser, tone using a pH 4.5 skin and moisturize using a gel type lotion.
I’m using my trusty old OLENS x ANNA SUI grey contact, sitting at a DIA of 14.2mm. I have a GEO Flower lens which is 15mm DIA but I found that it looked too strange to have a natural 13.8mm eye with a 15mm DIA lens. If you own a 14.5mm lens and your eyes are as big as mine, then I’d probably recommend you try using that as it creates a better effect. BTW I don’t recommend wearing these lenses for a long period of time, since the lens itself is fairly thick and can become irritatingly uncomfortable to wear as it gets drier.
STEP TWO: Prepare your face by applying your base, concealer and cooking material. Skip this step if you prefer to do your eyes first.
But I use a lot of powder. Probably best to avoid baking like I do.
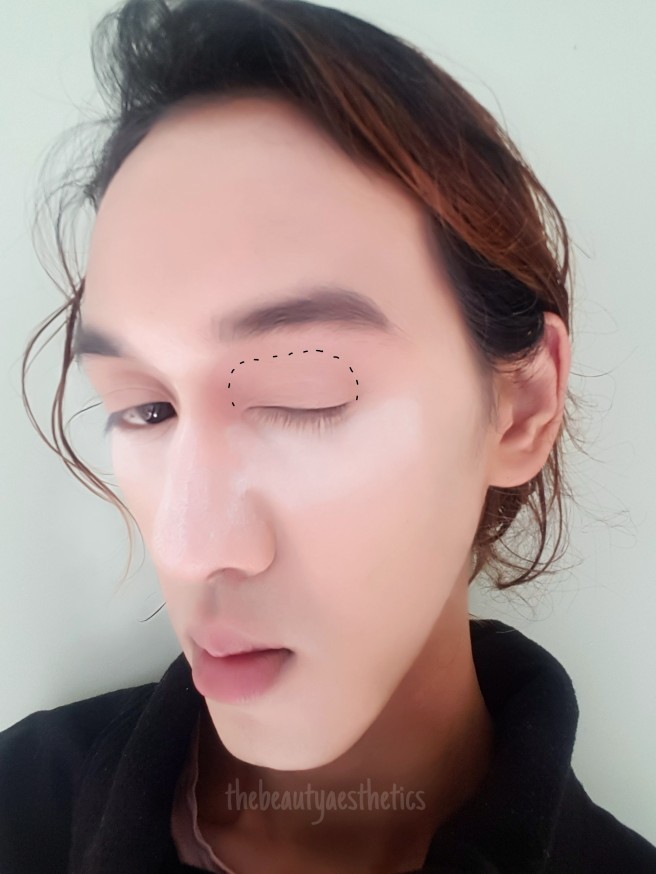
STEP THREE: Prepare your eyelids using a primer and base color.
I used concealer and a muted taupe shade as my base color for the eyeshadow.
I forgot about the bake on my nose, that I ended up leaving it for too long. After removing the bake, my nose felt incredibly dry afterwards.
STEP FOUR: Draw your guide for your eyeliner using shadow before applying eyeshadows
This step really is optional. I’m just terrible at planning and usually go with the flow when it comes to everything, so just as a precaution, I chose to draw the guideline for my own benefit. Heck, maybe this step might help one of you guys.
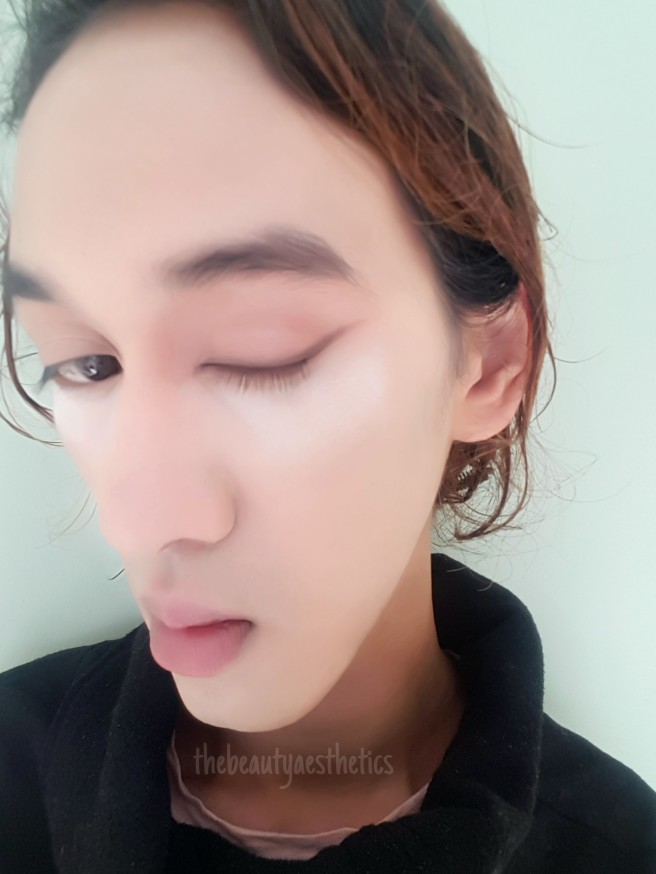
STEP FIVE: Avoiding the middle of your eyelids, apply your dark shadow on the entirety of your eyelid, including and emphasizing the crease. Extend the color all the way to the front and inner corners of the eye, and drag along the bottom eyelid halfway from the front of the eye.
Krystal actually had black on her eyes, but since I wanted the look to be a bit softer, I opted for brown. The color is also way more forgiving than black is.
STEP SIX: Using your finger or a dampened shadow placement brush, apply a shimmery shade that is two shades lighter than your crease color to the blank areas of your eyelids for color variation.
If you used black, then a silver or a gold shimmer will look really nice with this look. Otherwise in my case, I used a shimmery copper with fine glitters.
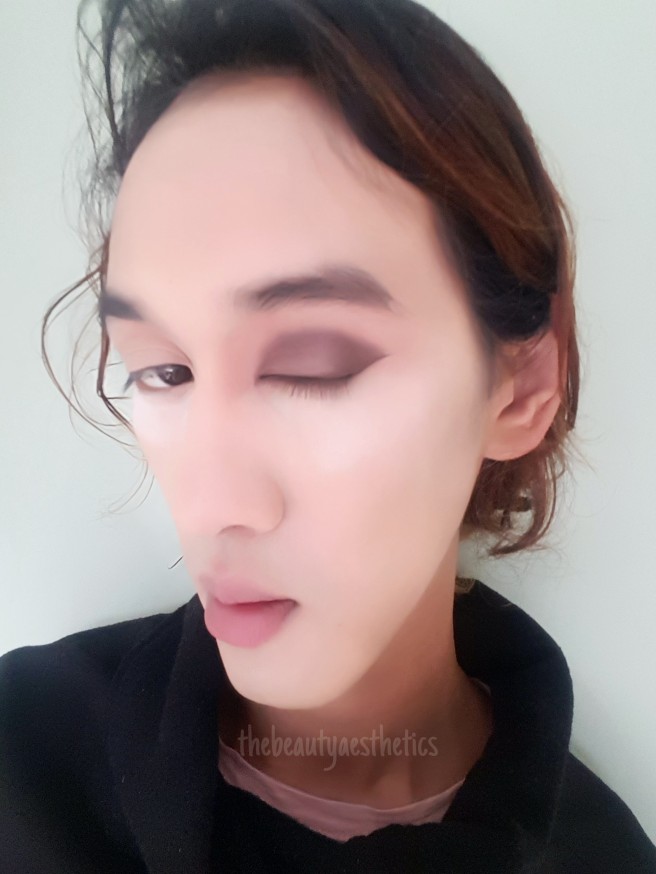
STEP SEVEN: Line your eyes following the guideline you created, winging the liner upwards to create a cat wing.
STEP EIGHT: Fill in your brow either the way you usually do them, or seek permission from the All Maker and rock an angry birds styled brow.
I didn’t ask the All Maker though, and unfortunately for me, I’m going to hell. God dammit.
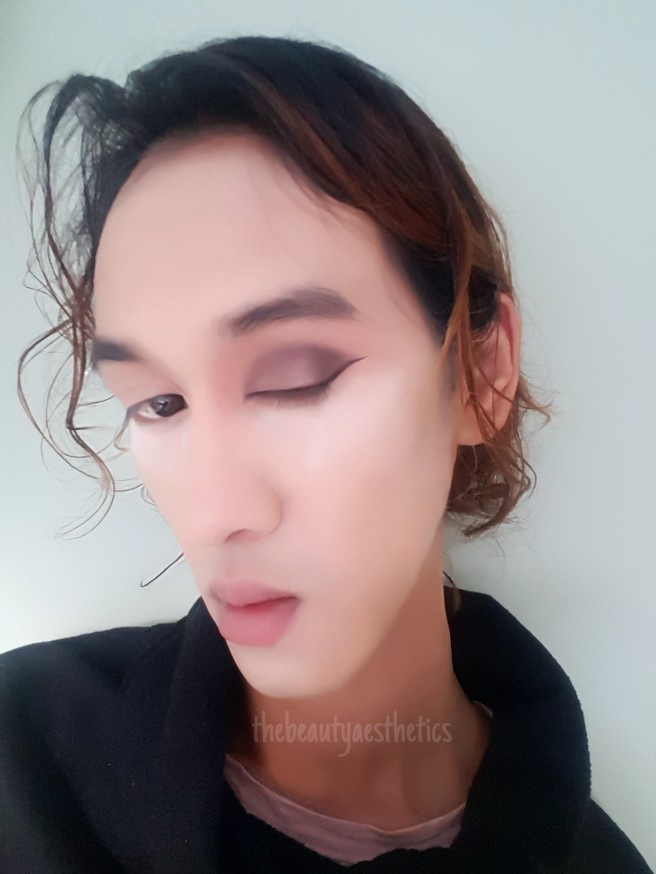
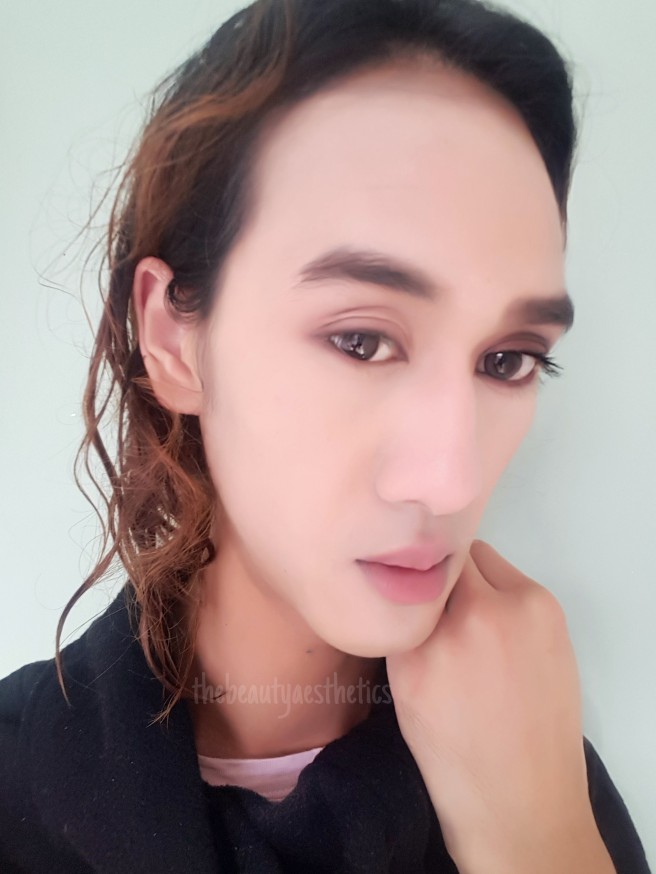
Unlike Krystal’s eye look, by using brown and adding the central shimmer, the eye looks less dark and more wearable.
STEP NINE: Curl your lashes and apply your mascara, and if necessary, apply highlight to your half of the face to complete the makeup for your dark side.
With the concept photos, Krystal appeared to not be wearing any blush or contour at all, so it’s up to you whether you want to apply it or not. I added the tiniest bit of blush to the outer cheek for color to the face, and highlight along the cheekbones to bring back some liveliness to the skin.
Once again, my facial expression is giving off the “I’m dead to the world” feels.
STEP TEN: Starting off with your natural eye, make sure to have primed and set your eyelid ready for eyeshadow. Take a camel shade and apply to the inner and outer eyelid for definition.
Usually I pray for pigment when it comes to eyeshadows, but in this case, I really wanted no pigment whatsoever. This eye look needed to be extremely light, as if it were barely there, in order to achieve the “no makeup” feel.
STEP ELEVEN: Line your eyes with dark brown eyeshadow, being careful not to extend past the eye line. Follow the natural shape to create the “no liner” appearance. Drag the color slightly down to the bottom eyelid for the “puppy” liner look. Alternatively, apply BROWN eyeliner to the upper water line and in between the lashes for the “no liner” appearance.
Except, I lost my pencil liner so I can’t actually fill in the water line naturally. I went for the latter instead.
STEP TWELVE: Fill in your brows very naturally, following the natural shape and curvature of your brow, to make them look as if they haven’t been drawn on. Curl and apply mascara to your lashes and with that, completes your natural eye look.
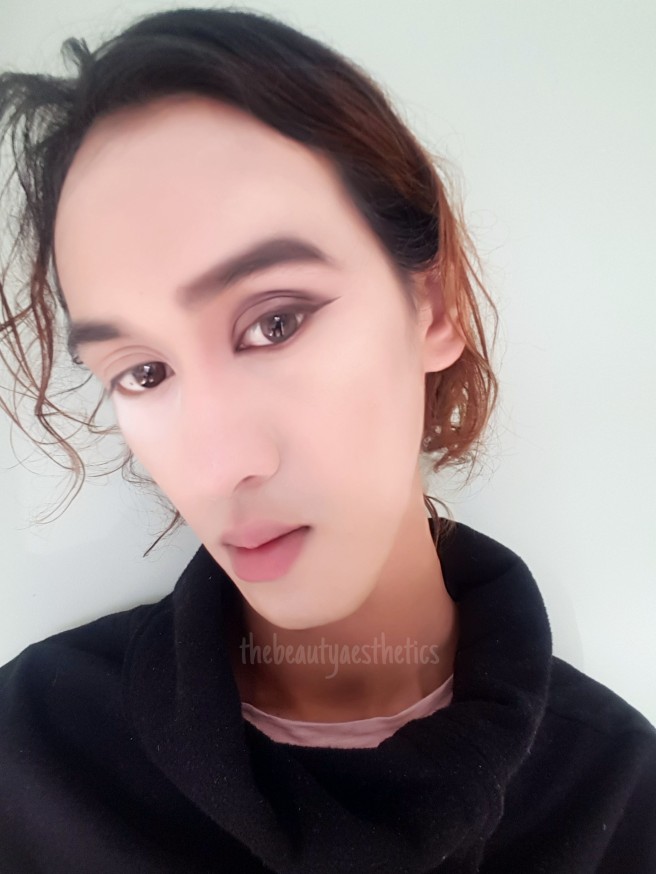
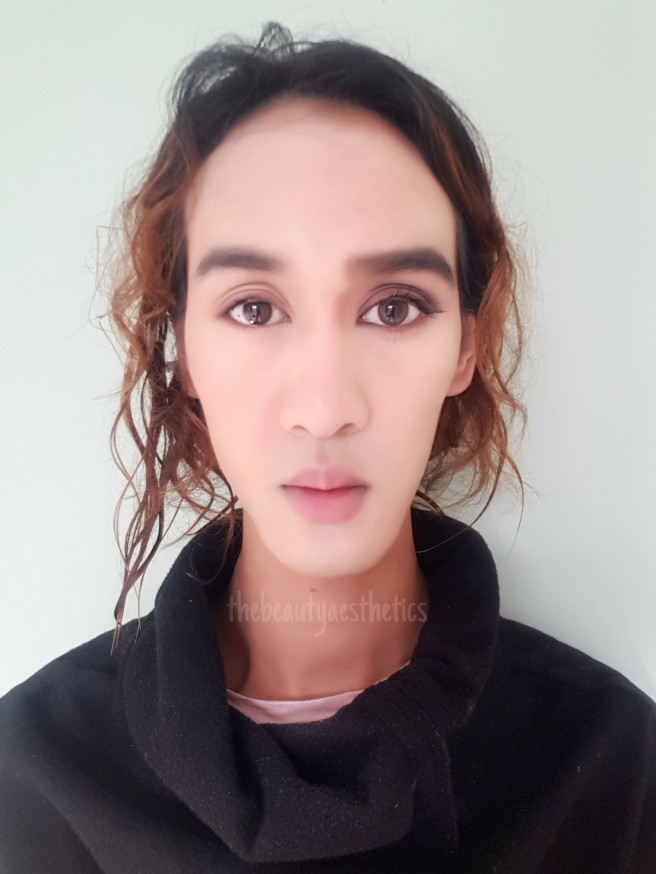
STEP THIRTEEN: Finish off the rest of your makeup however you please. Make sure to create the gradient lip look on your dark makeup side, and that completes the Red Light inspired makeup.
I also decided to contour my nose because why the fuck NOT.
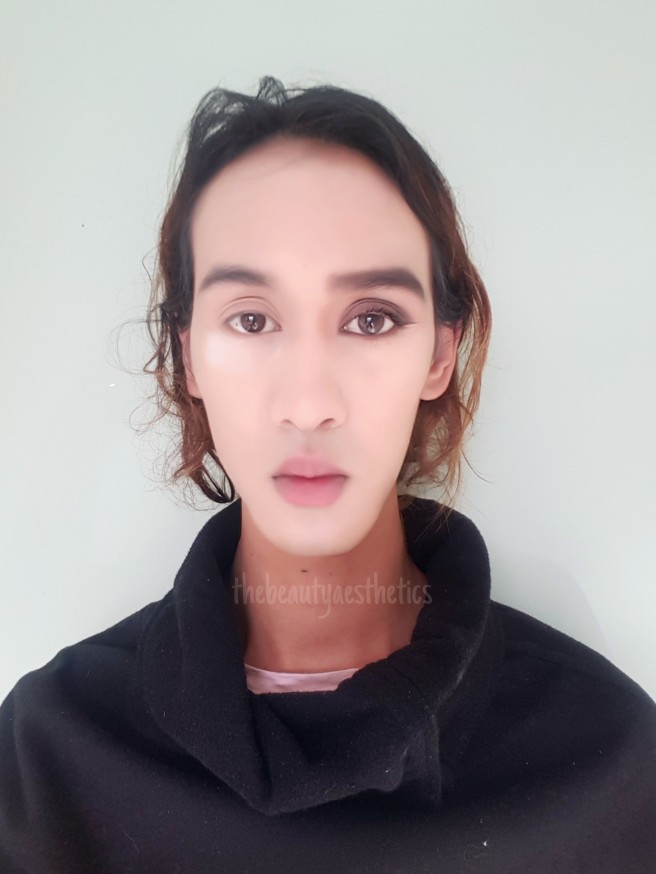
Once again, I’m probably going to do another attempt, this time, trying to actually recreate the proper look, by paying close attention to their eye makeup and the rest of the face. For the time being, if you enjoyed this post, then don’t forget to like it, subscribe to keep up to date with future blog posts and share with your friends and family. As per usual, your feedback is highly regarded and appreciated so don’t forget to leave any comments down below, or through my SNS.
I woke up one day thinking that I have palettes I haven’t touched, just sitting in my bedroom and it’s about time I tried them out to see what I can pull out of my ass as far as a makeup look goes. Being lazy in bed, I placed my headphones in my ears and put my music on shuffle. Sure enough, the first song that came on was F(x)’s Red Light, which threw inspiration into my head.
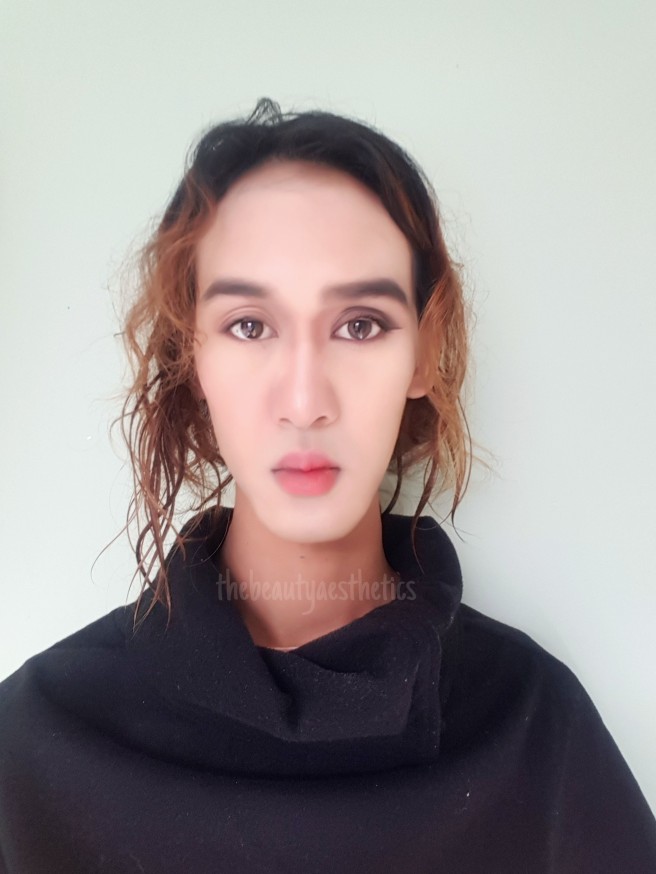
But let’s take a moment at how damn womanly I look though.
This makeup look I’m sharing with you is a red light inspired makeup that is slightly more wearable than the concept photos they released for a member in particular, Krystal. I also looked to Pony makeup tutorials for inspiration and fell in love with one of her simple looks, called Rosy Peach makeup, where I decided to use the colors on my lids for a more “made up” look. Keep reading to see how I achieved this mess.
Just like in the red light concept photos, one side will be slightly more natural than the other half of my face, rocking out a more glammed up look that is a little bit more wearable for going out. (Though I don’t recommend it because the makeup itself just looks strange to be worn out in public).
STEP ONE: Always start off with a freshly cleansed and moisturized face. Oh, and get your hair out of the way by tying it up, or securing with a makeup brush like I did.
I can’t stress enough how important skincare is for your face AND your makeup. Without adequate care for your skin, you can’t achieve decent makeup, so I strongly advise investing your money more into skincare than you do your makeup products. Remember that even terrible makeup products will work better if your skin condition is at it’s prime, than if you were to apply the same products on an unclean canvas.
As per usual, I cleansed with a 5.5pH cleanser, toned with a 4.5pH skin, and moisturized with a gel lotion.
Why my face looking like I’m dead to the world? I mean, I am, but still… By the way, new contacts are Russian Velvets from OLENS in blue, which aren’t the best contacts but are wearable for occasions like this. Personally don’t recommend because they’re uncomfortable.
STEP TWO: Apply your base and concealer as per usual, and additionally, if you prefer cream products, you can apply your cream contour/highlight in this step as well. Finish with a bit of powder and bake under your eyes.
There isn’t any wrong or right method when applying your base, so long as you apply it in a manner that prevents your makeup looking cakey or streaky. Make sure the base adheres nicely to the skin, is well blended and that most importantly, you are happy with the final results.
I chose to go a shade lighter than my skin tone simply because I want the shading of my face to look stronger.
I decided to also do my eyebrows in the same step as well, since I think brows can ultimately frame the face and give you an outline to how you want your eye makeup to look. Leaving the bake under your eyes is also optional, but I left mine simply because you’re applying eye shadows and if any fallout does occur, it’s easy to sweep it away with the bake.
Giving you those Kim K vibes.Basically, you want your base, bake and brows in place before you start the eyes, or completely fuck everything off and start with the eyes first if that’s how you do your makeup. I chose the latter because #lazyyyyyy
STEP THREE: Apply a base and a base color to the eyelids to create a blank canvas for eyeshadows to be worn upon.
I have very delicate eyelid skin, where the veins literally peek through. A traditional eye primer isn’t enough to cover the veins so I opted for concealer instead for added coverage. If you don’t have the same problem then a traditional shadow primer will do just fine.
I used a muted taupe color over the entire eye as a base color.
I even drew terrible guidelines to where to place the shadows. Ah so professional.
STEP FOUR: Starting with the natural side, apply a wash of rose pink color onto the lids.
STEP FIVE: Use a muted wine color in the outer V and blend into the rose pink shadow for contouring. Intensify the outer corner by using chocolate eyeshadow with a light hand. You don’t want the eye to look too dark, just enough for definition
STEP SIX: To add light to the eyelid, apply a shimmery peach toned shadow on the centre of the lids, inner corners and the entirety of the bottom eyelid. Blend slightly to remove harsh edges.
Guess what’s on my lip, cause I have no idea what it is TBH.
STEP SEVEN: Using a liner of your choice (I chose liquid cause it’s the easiest to draw with IMO), follow the natural shape of your eye and draw an extremely thin line, dragging the liner out slightly. Don’t lift the wing upwards or create a long wing as this creates a cat effect, which defeats the purpose of the natural look. What you want to achieve here is a naturally defined eye line. With the same chocolate shadow you used to contour with, apply that at the end of your bottom lid to connect the eyeliner for a “puppy” sort of liner feel.
STEP EIGHT: For the makeup side, just as before, you want to apply the same rose color to the mobile lid, and contour using the wine shade from before.
So just like before, apply your base tone to the eyes before adding color.Then your rose.Then your wine. Might as well grab yourself some REAL wine while you’re at it.
STEP NINE: Use a camel shade to define the outer V and drag the color into the crease, making sure to blend the colors naturally with each other. Using the same chocolate shade from before, intensify the corner and drag the color slightly into the crease; this time you are trying to make the eye darker, so you can go ham at this stage if you want.
So apply your camel shade around the areas shown, and then apply chocolate to redefine and intensify.
STEP TEN: Using the same peach tone, apply the color to the centre of the lid, inner corners and bottom eyelid for color variation and to add light to the eyelid.
STEP ELEVEN: Apply eyeliner, this time, winging the liner up to create a cat eye effect. Just like with the natural side, use the chocolate color on the bottom lid to connect. With this, completes the eye makeup.
That eyeliner is messy, why did I NOT see that before.
STEP TWELVE: Curl and apply mascara, define the face with contour (I sharpened the dark makeup side, and left the contouring natural on the other half of my face) and highlight. Apply a little bit of muted rose blush if you like, or skip this step if you want.
Try not to apply too much highlight like I did; I went crazy.
I could probably sit on a cliff and guide ships back to shore safely with the amount of highlighter I used.
STEP THIRTEEN: Finish the makeup with a pink or nude lipstick and that finishes the complete look.
Or, you can add extra if you want. It’s makeup after all and you can do whatever you please with the products you spent your money on. Treat yo’self.
Please do your hair, unlike me. I just look messy now.
So, if you read up till here, then you’d realize by the end of this tutorial that the makeup isn’t exactly F(x) style, nor is it Pony style. I got inspiration from the two and used both ideas to create this look. If you do however, want me to try (and probably fail) recreate either looks, then please let me know in the comments below or via one of my SNS accounts. Don’t forget if you enjoyed this post, then give it a like, subscribe to this blog and share with your friends and family. Until the next post, this has been Anthony from The Beauty Aesthetics.
When it comes to skincare, ESPECIALLY in the Asian Beauty world, you don’t get many opportunities to save on products since everything generally retails for higher than what you would typically find in your local drugstore. When I worked in skincare retail, I learnt the habits of people shopping for their skin, and ultimately it came down to two questions that provoked your choice of purchase. Here today in this blog post, I really want to have this answered so that no more do we need to worry over something so trivial, if it means getting our shopping done a little bit faster.
So which is actually better? High end or low end Asian Beauty?
Throwing bias aside, we have to look at the pricing points and the label name of different products. If you follow Japanese beauty, then you’ll know that brands such as (but not limited to) Shiseido, SKII and POLA are going to retail higher than brands like Mandom or Kracie. Same goes for Korean beauty, where Whoo and Sulwhasoo are going to go for a steeper price than roadshop brands like Skinfood or Etude House. This is because of the ideal market these particular named brands are trying to target, and their success over the years.
With brands in the higher end spectrum, I’m not speaking for all of us, but having a product from a luxurious brand tends to become an item of display and bragging, don’t you think? I mean, why not show off your $150 clay mask from Whoo, or your $1088 serum from POLA? If you’re discussing HE (high end) VS LE (low end) in regards to presence and stature, then of course the high end will win.
But, what about functionality? This is where it ultimately gets difficult and unable to be answered. Please remember that all our skin types and skin conditions vary amongst ALL of us and therefore what works for some will backfire on others; vice versa. For me to pick one brand over another as the ultimate winner is severely biased, since it works for me and will most probably won’t work it’s full potential on you. When it comes to shopping however, please keep in mind that all skincare is made with a certain mixture of ingredients that are sourced or produced differently, but scraping only the surface of this unfamiliar region, skincare ingredients are more than likely going to be similar between HE and LE.
As far as functionality goes, there isn’t a clear cut winner. For shopping as far as ingredients go however, I would probably hand the ball over to the LE market, since you’re more than likely going to find the same, if not, extremely similar ingredients in either spectrum.
BY THE WAY, don’t be fooled by fancy named ingredients. Norwegian spring water tapped from within the deep mountains flowing into a pristine stream where fish blow rainbow bubbles and fart glitter particles is something you might find on a HE skincare product. Reality is, the water probably comes from a regular distillation process, if not, from a filtered tap. Whether it actually comes from Norway, who knows. The question is, are you going to RISK a few hundred dollars for a fancy named ingredient with ultimate claims, for the sake of your skin, if the ingredient is actually incredibly common and most probably found in LE products that utilize the same ingredient?
How about products going for your specific skin type? If your skin is easy, then by all means go and buy whatever the hell you want. Your skin will readjust and rebalance anyway, with your normal skin type that is virtually at the brink of perfection. For us oily skin types, it comes down to the brand and mass appeal they’re going for; and same goes for dryer skin types or those suffering from lines and wrinkles.
Quite frankly, you’re more likely to have to spend more on your skincare if lines are your biggest concern, or if your skin is dry compared to people who have oilier skin types. Take Shiseido for example. All their lines, regardless of their ultimate claims, are specifically ideal for people who have that bit of dryness where a regular product may fail, and their ingredients also help to “treat” unwanted lines along the skin texture. You won’t necessarily find anything to help you in the LE market that can handle what a luxury brand can offer.
Who wins then?
Does the luxury brand take home the medal, or does the cheaper market sneak up and steal the prize away for the taking?
Anthony, what is the answer?
My humble thoughts are screw whatever people think. You’re probably reading this blog post thinking that I’m an advocate for luxury brands, given my stash of skincare is virtually POLA cosmetics, Sulwhasoo, Whoo and La Mer. Don’t get what I use on my face wrong, because there are plenty of good brands retailing for a fraction of the price of the products I CHOOSE to use. The real answer is, whatever you can afford at the time of your spending, the winner goes to that brand. Sure, luxury brands all have amazing advertising and always win in the product placement game, but what about the lower tiers that rely only on their products to sell without the influence of celebrity endorsement, or cover girls washing their makeup covered faces with nothing, only to reveal perfect skin that has makeup still intact? Does that mean that their products are shit because their names aren’t as strong as other brands who are considered above them as far as ranking goes?
Take HERA cosmetics for example. The brand was deemed “The best in Korea” for a long time, probably still is. Judging by that title alone, you’d automatically think that HERA is the best for everyone, or that if people are using HERA and claim it to be what it is, then it must be good. I’ve used HERA and I personally think their products are the worst I’ve tried, are expensive considering what you have accessible in today’s age, and would happily save all my money to shop at COSRX instead, where five COSRX products equals ONE HERA product in terms of pricing.
I was actually asked to do this post by many people, to finally put the question to rest, but unfortunately as an individual who has had a taste of both tiers of skincare, there really isn’t a definite answer. All I can say, is to decide what you buy with your own money and hope that it works for your skin. That’s what skincare is to a lot of us, and reviews like mine, or other people out there who are FAR MORE successful than I am, can only say so much since we’re all biased in our own little ways. My advice? Never trust a review online 100% unless your skin is literally identical to theirs. What you may consider expensive, may be cheap to another. Does high end always result in better skin? Of course not. Same goes for cheaper brands.
If you were wondering, yes, this post was also inspired by a personal experience of mine. I knew this girl (and I refer to her as a girl, knowing damn well she is a grown ass woman who acts so childish I refuse to see her other than a little girl) who literally looked down on me because I did have my moments where I went and bought LE products from time to time. She always looked at me with such distaste and it bothered me, because who was she to judge what I chose to use on my skin, or own what I own. Life isn’t about the luxury brands and wealth, if you aren’t entitled to your own opinions, happiness and tastes. If you’re so bothered by what another person does with their money, then you should have a seat and reflect on why it makes you feel this way. It goes to you as well; if you have someone like that in your life. They’re the kind of person that makes you feel bad for walking into a particular store, or for owning something that might be the cheaper alternative to something deemed luxurious. Who needs such negativity in their lives?
By the way, if you enjoyed this post then please don’t forget to like it, subscribe to this site and share with your friends and family. Social networks are of course left below and if you have any other ideas for blog posts, then please let me know. I love hearing from you guys so any feedback is welcomed with open arms.